Caramel Apple Cheesecake Bars: The Ultimate Fall Dessert Recipe
There’s something magical about the combination of creamy cheesecake, sweet caramel, and tender apples that makes caramel apple cheesecake bars an irresistible fall dessert. These decadent bars bring together the best flavors of autumn in one convenient, handheld treat that’s perfect for gatherings, potlucks, or simply satisfying your sweet tooth on a crisp fall evening. Whether you’re an experienced baker or just starting your culinary journey, this recipe will guide you through creating bakery-quality cheesecake bars right in your own kitchen.
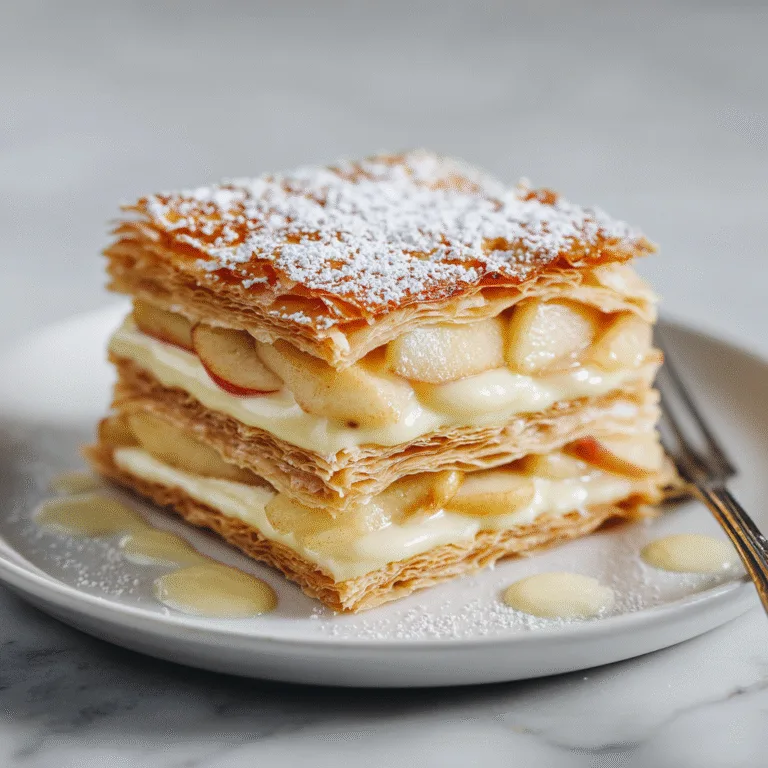
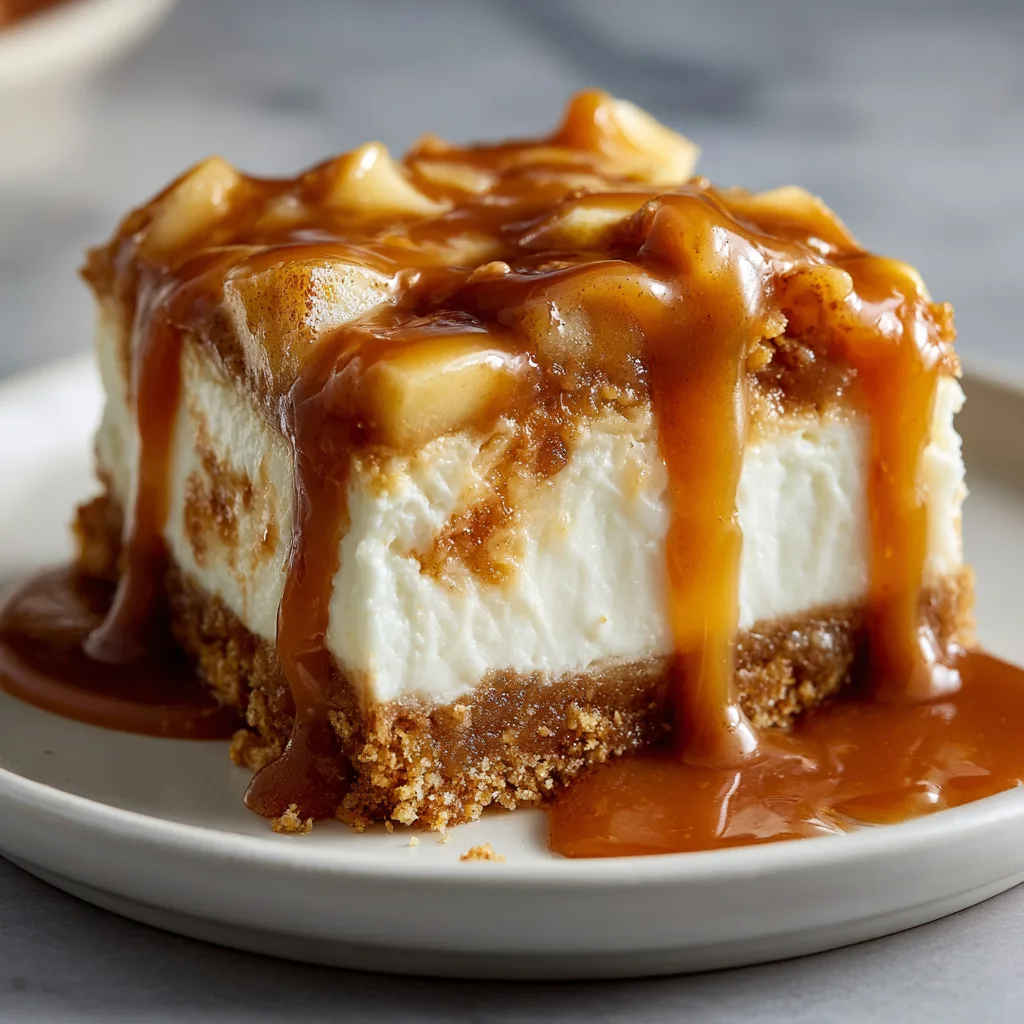
The beauty of caramel apple cheesecake bars lies in their perfect balance of textures and flavors. The buttery graham cracker crust provides a satisfying crunch that contrasts beautifully with the smooth, velvety cheesecake layer. Fresh apple pieces add natural sweetness and a slight tartness that cuts through the richness, while the luscious caramel drizzle ties everything together with its deep, buttery sweetness. Each bite is an experience that captures the essence of fall in the most delicious way possible.
What makes this recipe particularly appealing is its versatility and make-ahead friendly nature. Unlike traditional cheesecakes that require precise timing and careful monitoring, these bars are remarkably forgiving and can be prepared a day or two in advance. This makes them ideal for busy hosts who want to impress their guests without spending hours in the kitchen on the day of the event. The bars also transport well, making them perfect for office parties, bake sales, or family gatherings where you need a dessert that travels without losing its appeal.
Why This Caramel Apple Cheesecake Bars Recipe Works
The success of this recipe comes down to several key factors that work together to create the perfect dessert. First, the graham cracker crust is pre-baked just enough to set it without over-browning, creating a sturdy foundation that won’t become soggy from the cheesecake filling. The ratio of butter to crumbs is carefully calculated to ensure the crust holds together while remaining tender and flavorful.
The cheesecake layer itself uses full-fat cream cheese combined with sour cream, which creates an incredibly smooth texture while adding a subtle tang that balances the sweetness. Room temperature ingredients are crucial here, as they blend together seamlessly without lumps or air pockets that could cause cracks during baking. The addition of fresh apples coated in cinnamon adds moisture and flavor throughout the bars, ensuring every bite contains that signature apple taste.
Perhaps the most important aspect is the baking method. These bars are baked at a moderate temperature in a water bath, which provides gentle, even heat that prevents the cheesecake from cracking or drying out. The result is a creamy, perfectly set cheesecake layer that slices cleanly and maintains its shape even at room temperature.
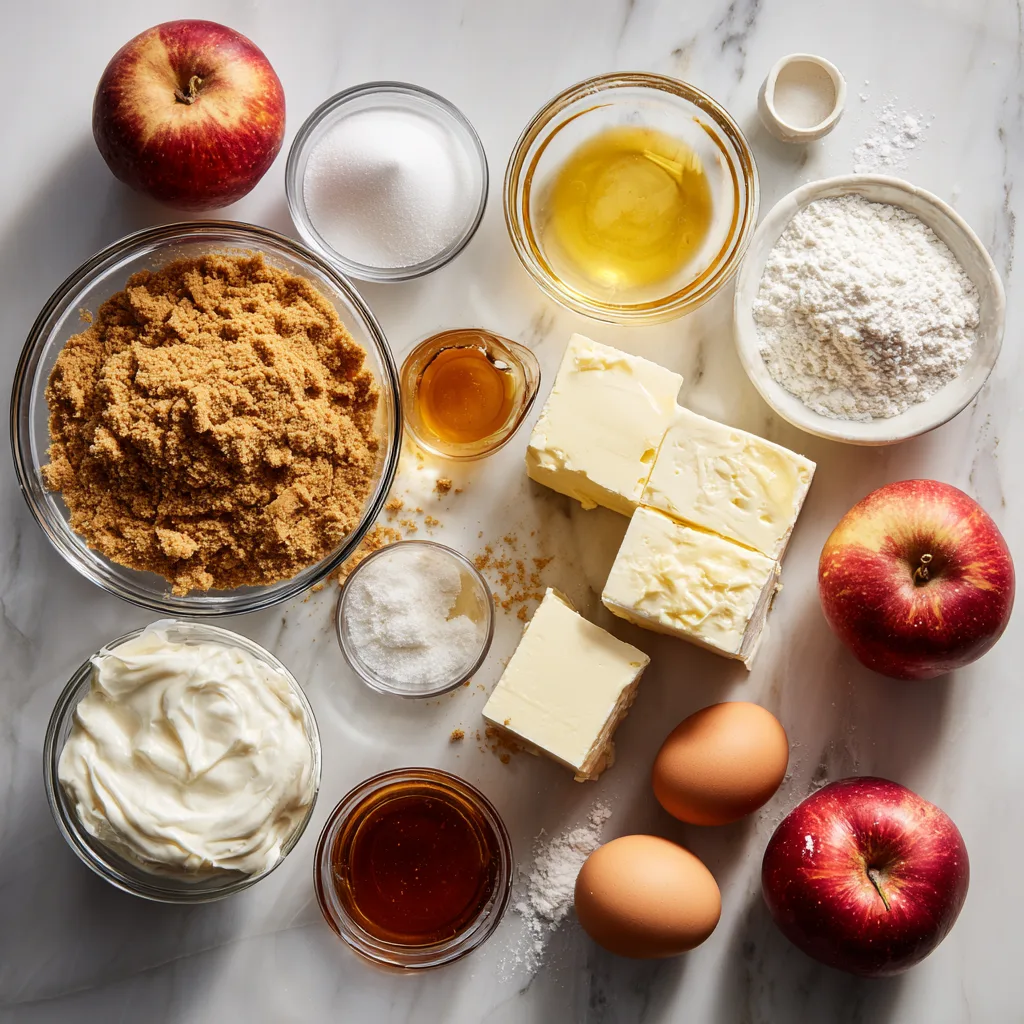
Ingredients
Graham Cracker Crust:
- 2 cups graham cracker crumbs
- 1/3 cup granulated sugar
- 1/2 cup unsalted butter, melted
- 1/4 teaspoon ground cinnamon
Cheesecake Filling:
- 24 ounces cream cheese, softened to room temperature
- 3/4 cup granulated sugar
- 1/3 cup sour cream, room temperature
- 3 large eggs, room temperature
- 2 teaspoons vanilla extract
- 1/4 teaspoon salt
Apple Layer:
- 2 medium apples, peeled and diced into small pieces
- 2 tablespoons brown sugar
- 1 teaspoon ground cinnamon
- 1 tablespoon all-purpose flour
Caramel Topping:
- 1 cup caramel sauce, store-bought or homemade
- Sea salt flakes for garnish (optional)
Instructions
- Preheat your oven to 325°F (163°C) and line a 9×13-inch baking pan with parchment paper, leaving overhang on the sides for easy removal later.
- In a medium mixing bowl, combine graham cracker crumbs, sugar, melted butter, and cinnamon until the mixture resembles wet sand and holds together when pressed.
- Press the crumb mixture firmly and evenly into the bottom of the prepared baking pan, using the bottom of a measuring cup to create a compact, uniform layer.
- Bake the crust for 10 minutes until lightly golden and fragrant, then remove from oven and let cool while preparing the filling.
- In a separate small bowl, toss diced apples with brown sugar, cinnamon, and flour until evenly coated. Set aside to allow apples to release some moisture.
- Using an electric mixer, beat the softened cream cheese on medium speed for 2-3 minutes until completely smooth and fluffy with no lumps remaining.
- Add granulated sugar to the cream cheese and continue beating for another 2 minutes until well incorporated and the mixture is light and airy.
- Mix in sour cream, vanilla extract, and salt, beating on low speed just until combined and the mixture is uniform in color and texture.
- Add eggs one at a time, beating on low speed after each addition just until incorporated. Avoid overmixing at this stage to prevent excess air bubbles.
- Pour half of the cheesecake batter over the cooled crust, spreading it evenly with a spatula to cover the entire surface.
- Distribute the cinnamon-coated apple pieces evenly over the cheesecake layer, pressing them gently into the batter so they’re partially submerged.
- Pour the remaining cheesecake batter over the apples, spreading carefully to ensure even coverage and smooth the top with an offset spatula.
- Place the baking pan inside a larger roasting pan and add hot water to the outer pan until it reaches halfway up the sides of the cheesecake pan.
- Carefully transfer to the preheated oven and bake for 55-65 minutes until the edges are set but the center still has a slight jiggle when gently shaken.
- Turn off the oven and crack the door open slightly, allowing the cheesecake to cool gradually in the oven for 1 hour to prevent cracking.
- Remove from oven and water bath, then cool completely at room temperature for another hour before refrigerating for at least 4 hours or overnight.
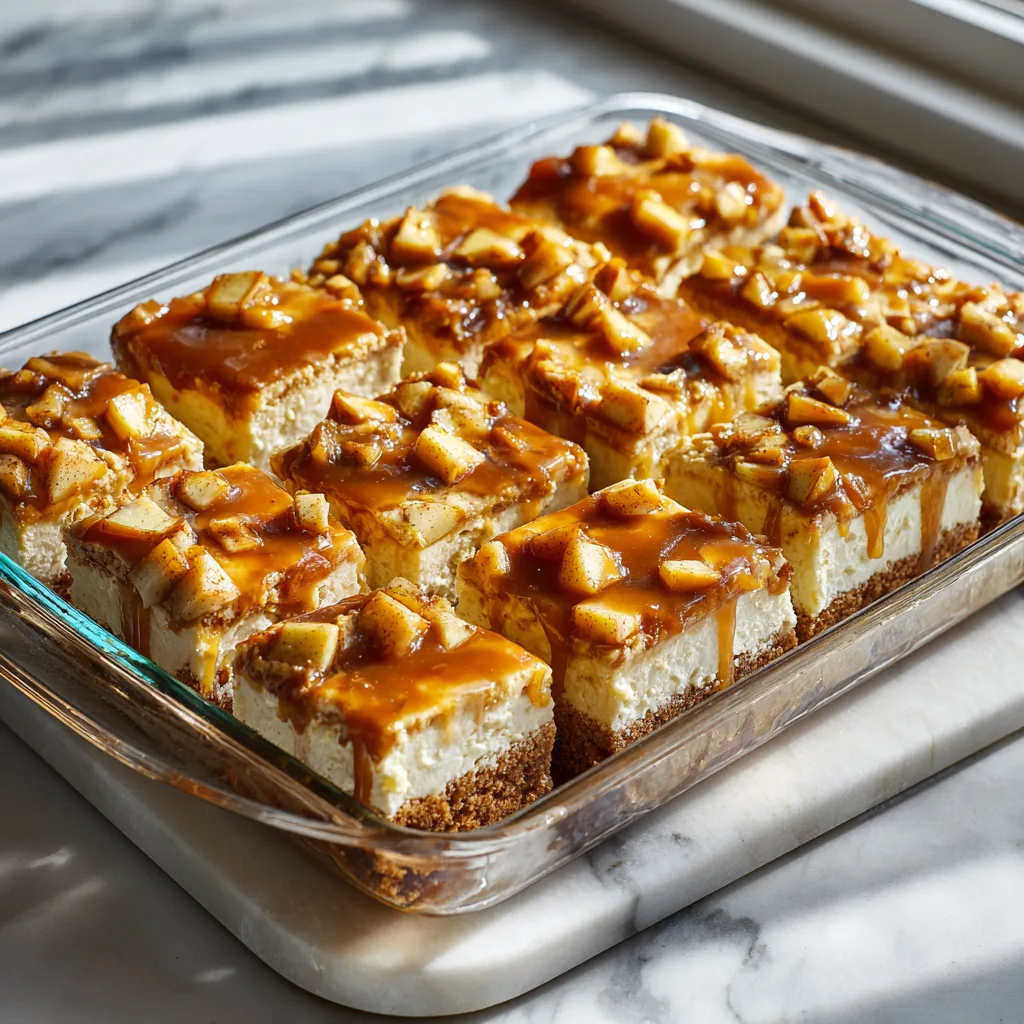
- Once fully chilled and set, use the parchment paper overhang to lift the cheesecake bars from the pan and transfer to a cutting board.
- Cut into squares or rectangles using a sharp knife, wiping the blade clean between cuts for neat edges.
- Drizzle each bar generously with caramel sauce, allowing it to cascade down the sides and pool slightly at the base.
- Sprinkle with sea salt flakes if desired, then serve immediately or store covered in the refrigerator until ready to enjoy.
Caramel Apple Cheesecake Bars
Ingredients
Equipment
Method
- Preheat oven to 325°F (163°C) and line a 9×13-inch baking pan with parchment paper, leaving overhang on sides.
- Combine graham cracker crumbs, sugar, melted butter, and cinnamon. Press firmly into bottom of prepared pan.
- Bake crust for 10 minutes until lightly golden. Remove and let cool.
- Toss diced apples with brown sugar, cinnamon, and flour. Set aside.
- Beat cream cheese for 2-3 minutes until smooth and fluffy.
- Add granulated sugar and beat for 2 minutes until well incorporated.
- Mix in sour cream, vanilla extract, and salt on low speed until combined.
- Add eggs one at a time, beating on low speed just until incorporated.
- Pour half of cheesecake batter over cooled crust, spreading evenly.
- Distribute apple pieces evenly over batter, pressing gently.
- Pour remaining batter over apples and smooth the top.
- Place pan in larger roasting pan. Add hot water to outer pan halfway up sides.
- Bake 55-65 minutes until edges are set but center has slight jiggle.
- Turn off oven, crack door open, and let cool in oven for 1 hour.
- Remove from oven and water bath. Cool at room temperature for 1 hour, then refrigerate at least 4 hours.
- Lift from pan using parchment overhang. Cut into bars with clean knife.
- Drizzle generously with caramel sauce and sprinkle with sea salt if desired. Serve chilled.
Notes
The Secret to Perfect Cheesecake Bars Every Time
Achieving bakery-quality caramel apple cheesecake bars at home requires attention to a few critical details. Temperature is perhaps the most important factor—always bring your cream cheese, eggs, and sour cream to room temperature before beginning. Cold ingredients don’t blend smoothly and can result in a lumpy filling with an uneven texture. Simply leave them out on the counter for about an hour before starting your recipe.
Mixing technique also plays a crucial role in the final texture. While you want to beat the cream cheese thoroughly to eliminate lumps, once you add the eggs, mixing should be minimal. Overbeating at this stage incorporates too much air, which can cause the cheesecake to puff up during baking and then collapse and crack as it cools. Use low speed and mix just until each egg disappears into the batter.
The water bath might seem like an unnecessary step, but it’s actually the secret to achieving that perfectly smooth, crack-free surface. The steam created by the hot water provides gentle, humid heat that allows the cheesecake to bake slowly and evenly. Just be sure to wrap your pan well if it’s not completely watertight, or use a high-quality springform pan designed for water baths.
Customization Ideas and Variations
One of the best things about this recipe is how easily it can be adapted to suit different tastes and occasions. For a more intense apple flavor, consider using a combination of apple varieties—Granny Smith apples add tartness while Honeycrisp or Gala apples contribute sweetness. You can also increase the apple layer by using three apples instead of two for those who love extra fruit in their desserts.
The caramel topping can be customized as well. While store-bought caramel sauce works perfectly fine, making your own caramel from scratch elevates these bars to restaurant-quality status. Add a splash of bourbon or rum to the caramel for an adult twist, or keep it family-friendly with a hint of maple syrup. Some bakers like to mix chopped pecans or walnuts into the crust for added crunch and nutty flavor.
For seasonal variations, try adding a layer of pumpkin puree mixed with warming spices like ginger and cloves between the cheesecake layers. During summer months, swap the apples for fresh peaches or berries and replace the caramel with a fruit compote. The possibilities are truly endless once you master the basic technique.
Storage and Serving Suggestions
Proper storage is essential for maintaining the quality and food safety of your caramel apple cheesecake bars. These bars should always be stored in the refrigerator, covered tightly with plastic wrap or in an airtight container. They’ll keep well for up to five days, though they rarely last that long once people discover them in the fridge. The cheesecake actually improves after a day or two as the flavors meld together and the texture becomes even creamier.
For serving, remove the bars from the refrigerator about 15-20 minutes before you plan to eat them. This takes the chill off and allows the flavors to come forward more prominently. The caramel drizzle can be added just before serving for the most attractive presentation, or you can drizzle it over the entire pan before cutting if you prefer convenience over aesthetics.
These bars also freeze exceptionally well, making them perfect for advance preparation. Wrap individual bars tightly in plastic wrap, then place them in a freezer-safe container or bag. They’ll keep frozen for up to three months. To thaw, transfer them to the refrigerator overnight, and they’ll be ready to enjoy the next day with no loss of quality.
Conclusion: Your New Favorite Fall Dessert
Caramel apple cheesecake bars represent everything we love about fall baking—comforting flavors, impressive presentation, and the ability to feed a crowd without spending all day in the kitchen. This recipe strikes the perfect balance between sophisticated dessert and approachable home baking, making it suitable for both special occasions and casual weeknight treats. The combination of textures and flavors creates a memorable dessert experience that will have everyone asking for the recipe.
Whether you’re looking to impress guests at a holiday gathering, contribute something special to a potluck, or simply treat your family to a delicious homemade dessert, these caramel apple cheesecake bars deliver on all fronts. The recipe is forgiving enough for beginners while still producing results that look and taste professional. Once you master this technique, you’ll find yourself returning to it again and again throughout the fall season and beyond. So gather your ingredients, preheat that oven, and get ready to create a dessert that captures the very essence of autumn in every delicious bite.