No-Bake Chickpea Protein Bars (Healthy, High-Protein Snack You’ll Love)
There’s something incredibly satisfying about having a homemade snack ready whenever hunger hits—especially when that snack is wholesome, naturally sweetened, and packed with protein. These No-Bake Chickpea Protein Bars are exactly that kind of treat: simple, nourishing, and surprisingly delicious.
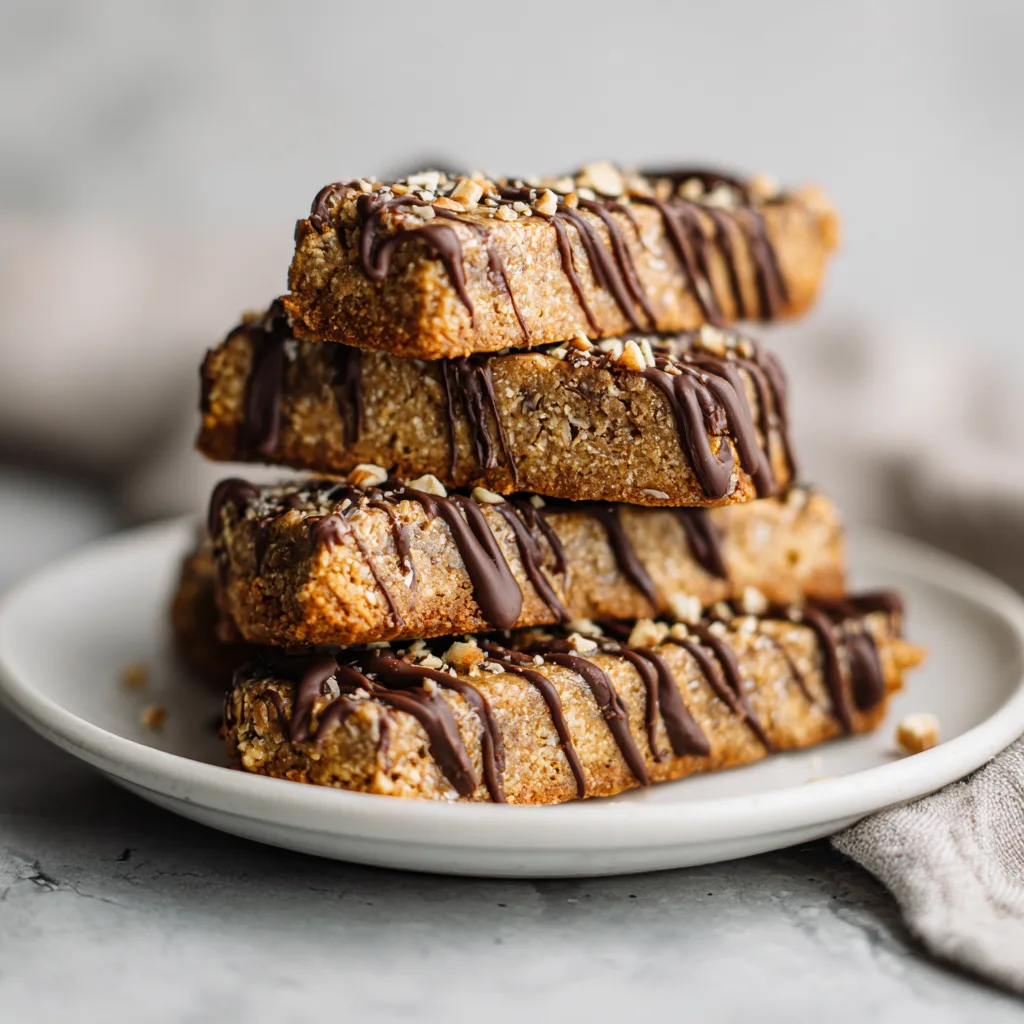
If you’ve never thought about using chickpeas in a sweet recipe, you’re in for a game-changing experience. These humble legumes transform into a smooth, creamy base that blends beautifully with nut butter, oats, and chocolate. The result? Soft, chewy bars that taste indulgent but are secretly good for you.
Perfect for busy mornings, post-workout fuel, or an afternoon energy boost, these bars check every box.
Why You’ll Love These Chickpea Protein Bars
These bars are not just another healthy snack—they’re a smarter, more satisfying alternative to store-bought protein bars.
First, they’re no-bake, which means no oven, no complicated steps, and minimal cleanup.

Second, they’re naturally high in protein and fiber, thanks to chickpeas and peanut butter. This combination helps keep you full longer and provides steady energy.
Third, they’re made with simple, wholesome ingredients you probably already have in your kitchen.
And finally, they’re customizable. Whether you like them chocolatey, nutty, or slightly fruity, you can easily tweak the recipe to suit your taste.
Ingredients
- 1 can (15 oz) chickpeas, drained and rinsed
- ½ cup peanut butter (or almond butter)
- ⅓ cup honey or maple syrup
- 1 teaspoon vanilla extract
- ½ cup rolled oats
- ¼ teaspoon salt
- ⅓ cup chocolate chips
- 2 tablespoons protein powder (optional)

Instructions
- Drain and rinse the chickpeas thoroughly, then pat them dry with a paper towel.
- Add the chickpeas to a food processor and blend until smooth and creamy.
- Add peanut butter, honey (or maple syrup), vanilla extract, and salt. Blend again until fully combined.
- Pulse in the rolled oats and protein powder (if using) until the mixture thickens into a dough-like consistency.
- Fold in the chocolate chips using a spoon or spatula.
- Line a small baking dish or pan with parchment paper.
- Press the mixture evenly into the pan, smoothing the top with a spatula.
- Refrigerate for at least 1–2 hours, or until firm.
- Once set, lift out of the pan and cut into bars.
- Store chilled and enjoy whenever you need a quick energy boost.
No-Bake Chickpea Protein Bars
Ingredients
Equipment
Method
- Blend chickpeas until smooth.
- Mix with remaining ingredients.
- Press into pan and chill.
Notes
The Secret Ingredient: Chickpeas
Chickpeas might seem like an unusual addition to a sweet snack, but they are the star of this recipe.
They create a smooth, creamy texture without needing flour or butter. Plus, they add plant-based protein, fiber, and essential nutrients—all while remaining neutral in flavor when combined with sweet ingredients.
Once blended with peanut butter and vanilla, you won’t even taste them. Instead, you’ll get a soft, cookie-dough-like base that’s both satisfying and nourishing.
Tips for Perfect No-Bake Bars
1. Blend Until Smooth
Take your time blending the chickpeas. A smooth base ensures the best texture.
2. Adjust Sweetness
Taste the mixture before chilling. Add more honey or maple syrup if you prefer a sweeter bar.
3. Chill Properly
Don’t rush the chilling step. It’s essential for firm, sliceable bars.
4. Use Parchment Paper
This makes it easy to lift the bars out of the pan and cut clean slices.
Flavor Variations
One of the best things about this recipe is how versatile it is.
Chocolate Lover’s Version
Add cocoa powder to the base and extra chocolate chips.
Nut-Free Option
Use sunflower seed butter instead of peanut butter.
Coconut Twist
Mix in shredded coconut for a tropical flavor.
Berry Boost
Add dried cranberries or chopped dates for natural sweetness.
Serving Ideas
These chickpea protein bars are perfect for:
- A quick breakfast on busy mornings
- A post-workout snack
- A lunchbox addition
- A healthy dessert alternative
Pair them with a glass of milk, a smoothie, or even a cup of coffee for a satisfying treat.
Storage Tips
Refrigerator
Store in an airtight container in the fridge for up to 5 days.
Freezer
Freeze for up to 2 months. Simply thaw for a few minutes before eating.
Why Homemade Protein Bars Are Better
Store-bought protein bars can be convenient, but they often come with added sugars, preservatives, and artificial ingredients.
Making your own bars gives you complete control over what goes into your food. You can adjust sweetness, swap ingredients, and create a snack that truly fits your lifestyle.
Plus, they’re often more affordable and taste fresher.
Final Thoughts
These No-Bake Chickpea Protein Bars prove that healthy eating doesn’t have to be boring or complicated. With just a handful of ingredients and a few simple steps, you can create a snack that’s both nourishing and delicious.
Whether you’re new to homemade protein bars or looking for a creative twist, this recipe is one you’ll come back to again and again.
Make a batch, store them in your fridge, and enjoy a wholesome treat anytime you need a little boost.