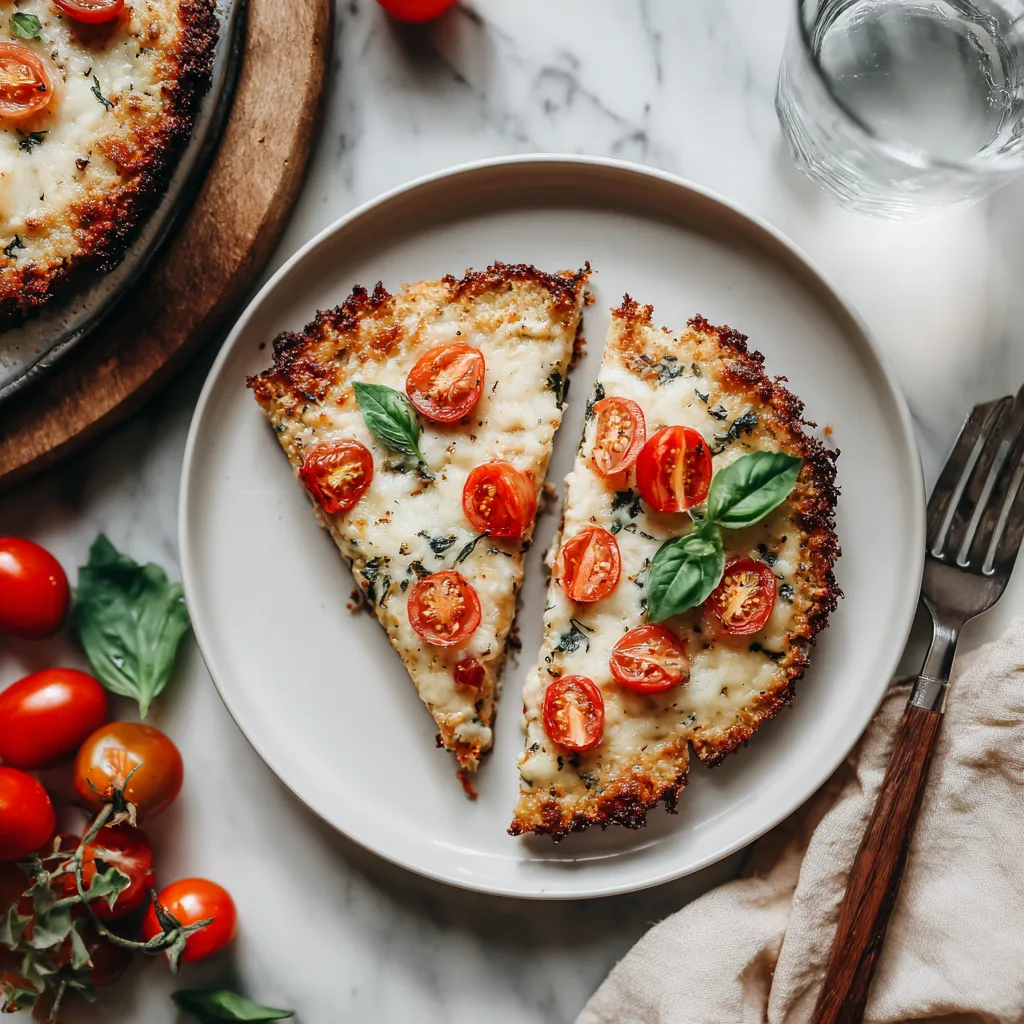
The BEST Cauliflower Pizza Crust (Gluten-Free & Sliceable!)
There was a time when the idea of cauliflower pizza crust sounded… suspicious. Could vegetables really replace dough? Would it fall apart? Would it taste like steamed vegetables pretending to be pizza?
If you’ve ever asked those questions, you are absolutely not alone.
But here’s the truth: when done right, cauliflower pizza crust isn’t just “good for gluten-free.” It’s genuinely delicious. Crispy edges. Tender center. Golden and sliceable. Strong enough to hold toppings. Flavorful enough that no one feels like they’re sacrificing anything.
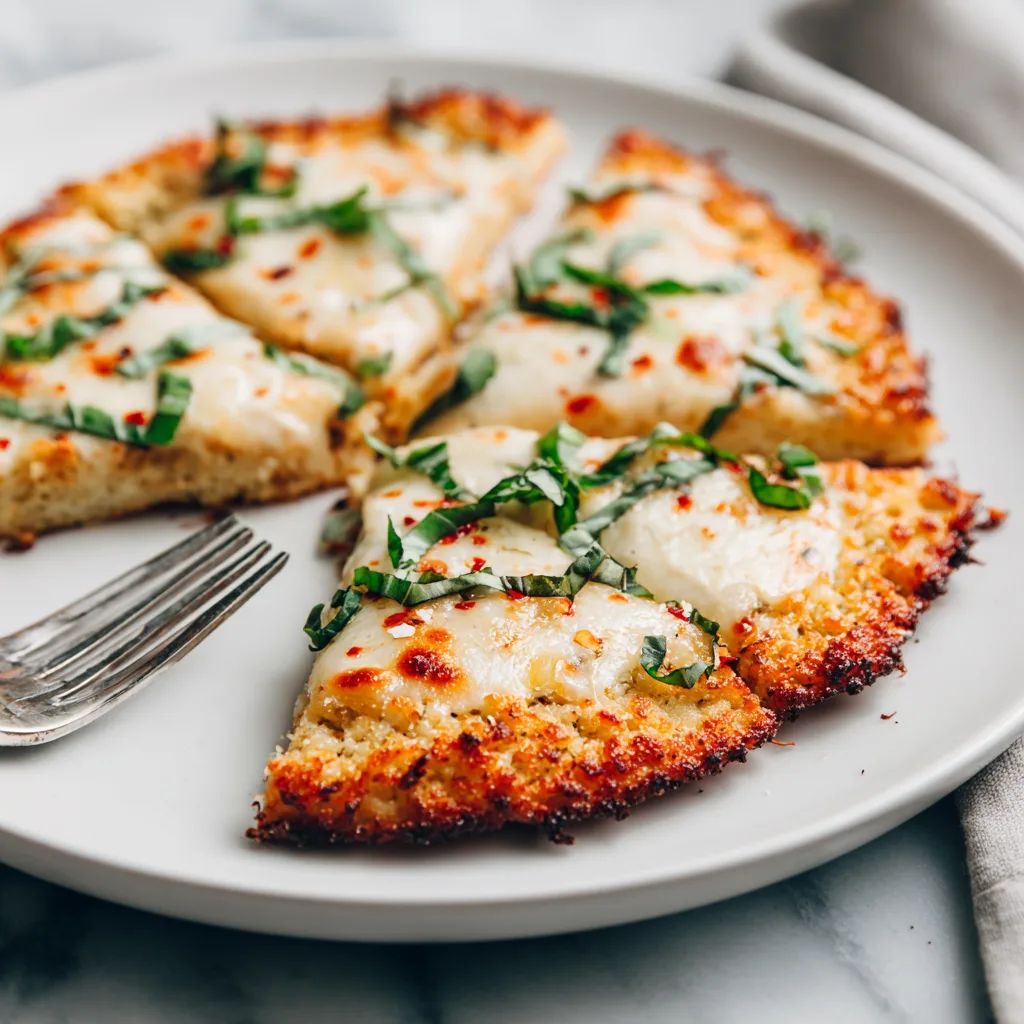
This recipe for The BEST Cauliflower Pizza Crust (Gluten-Free & Sliceable!) has been tested, tweaked, and perfected so you get a crust that actually works. No soggy middle. No crumbly disaster. Just real pizza satisfaction — with a lighter, low-carb twist.
Whether you’re eating gluten-free, cutting carbs, following keto, or simply looking for a healthier homemade pizza night option, this crust delivers.
Let’s talk about how to make it perfect every single time.
Why This Cauliflower Pizza Crust Actually Works
Not all cauliflower crust recipes are created equal. Some skip crucial steps. Some don’t remove enough moisture. Some rely on too little binder.
The secret to a sliceable cauliflower pizza crust comes down to three key things:
- Removing as much moisture as possible.
- Using the right ratio of cheese and eggs.
- Pre-baking before adding toppings.
Cauliflower contains a lot of water. If you don’t squeeze it thoroughly after cooking, your crust will be soft or crumbly. This step is non-negotiable.
But once you do it properly? Magic happens.
The result is a sturdy, golden crust with crispy edges and a tender interior that can actually be picked up and eaten like real pizza.
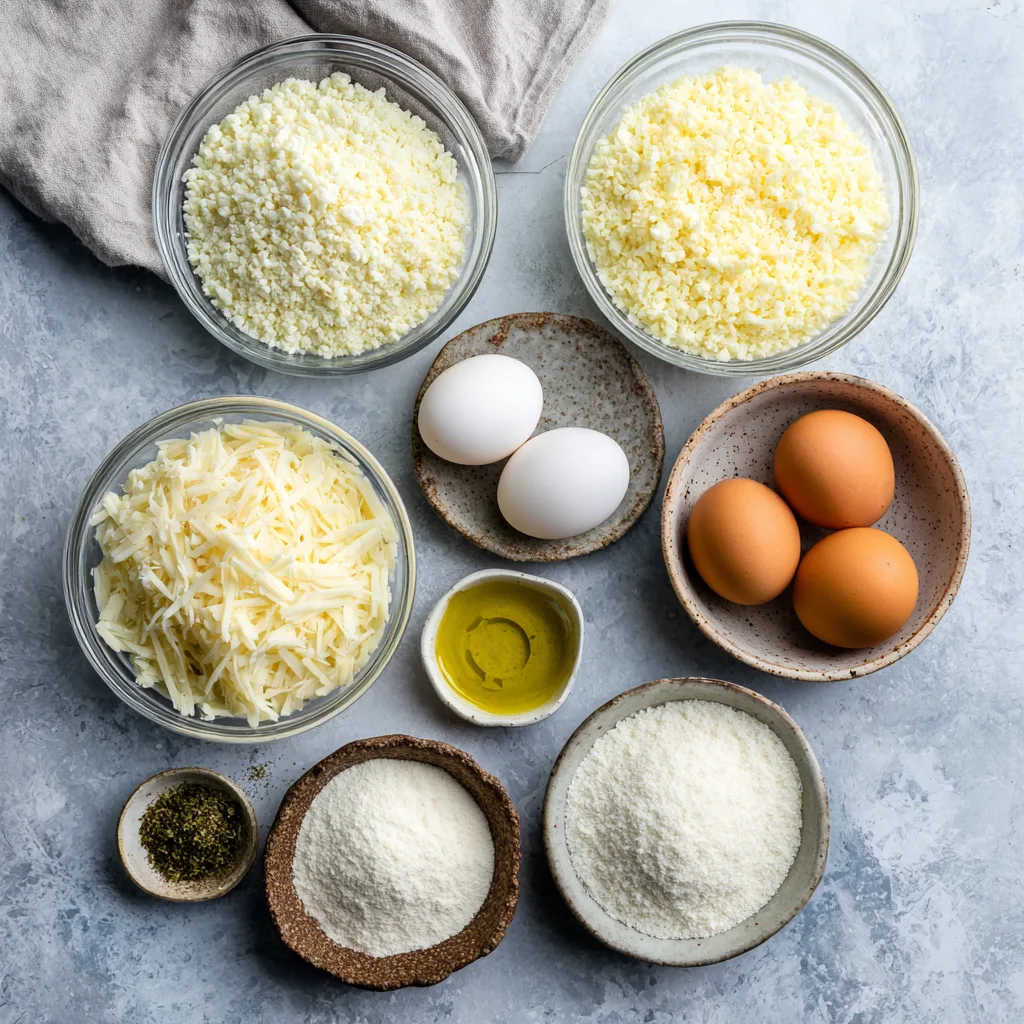
Ingredients
- 1 large head cauliflower (about 4 cups riced)
- 1 cup shredded mozzarella cheese
- 1/4 cup grated Parmesan cheese
- 2 large eggs
- 1 teaspoon Italian seasoning
- 1/2 teaspoon garlic powder
- 1/2 teaspoon salt
- 1 tablespoon olive oil (for brushing)
- Optional toppings: pizza sauce, extra mozzarella, pepperoni, vegetables, fresh basil
Instructions
- Preheat your oven to 425°F (220°C). Line a baking sheet or pizza pan with parchment paper.
- Remove the leaves and core from the cauliflower. Cut into florets and pulse in a food processor until it resembles rice-sized pieces. You should have about 4 cups.
- Transfer the riced cauliflower to a microwave-safe bowl. Microwave for 5–6 minutes until softened. Let it cool slightly.
- Place the cooked cauliflower into a clean kitchen towel or cheesecloth. Squeeze firmly over the sink to remove as much liquid as possible. This step is crucial — squeeze until almost no moisture drips out.
- In a large mixing bowl, combine the squeezed cauliflower, mozzarella, Parmesan, eggs, Italian seasoning, garlic powder, and salt. Mix until fully combined.
- Transfer the mixture onto the prepared baking sheet. Press it into a round pizza shape about 1/4 inch thick. Make sure edges are slightly thicker to prevent over-browning.
- Brush the top lightly with olive oil.
- Bake for 20–25 minutes, until golden brown and firm in the center.
- Remove from the oven. Add sauce and toppings as desired.
- Return to the oven and bake another 8–10 minutes, until cheese is melted and bubbly.
- Let the pizza cool for 5 minutes before slicing. This helps it set and become fully sliceable.
The BEST Cauliflower Pizza Crust (Gluten-Free & Sliceable!)
Ingredients
Equipment
Method
- Preheat oven to 425°F (220°C) and line baking sheet with parchment paper.
- Rice cauliflower and microwave until soft.
- Squeeze out all excess moisture using a towel.
- Mix cauliflower with cheeses, eggs, and seasonings.
- Press into thin round shape on baking sheet.
- Bake 20–25 minutes until golden and firm.
- Add toppings and bake additional 8–10 minutes.
- Cool slightly before slicing and serving.
Notes
Tips for the Crispiest Cauliflower Crust
1. Squeeze Like You Mean It
The more moisture you remove, the crispier your crust will be. Some people even squeeze twice for extra insurance.
2. Don’t Skip Pre-Baking
Adding toppings before the crust firms up will result in sogginess. Always bake the crust first.
3. Use Parchment Paper
Cauliflower crust sticks easily. Parchment guarantees easy removal.
4. Keep It Thin
Too thick and it may stay soft in the middle. Aim for about 1/4 inch thickness.
Flavor Variations
One of the best things about this gluten-free pizza crust is how customizable it is.
Herb-Loaded Crust
Add 1 tablespoon chopped fresh basil and parsley to the mixture.
Spicy Version
Mix in 1/4 teaspoon crushed red pepper flakes for a gentle kick.
Extra Cheesy
Increase mozzarella by 1/4 cup for a richer, more indulgent crust.
Dairy-Free Option
Use dairy-free shredded cheese alternatives that melt well. Texture may vary slightly.
Why It’s Perfect for Low-Carb & Keto Diets
Traditional pizza crust is flour-based and carb-heavy. Cauliflower crust dramatically lowers carbohydrate content while increasing fiber and nutrients.
It’s naturally gluten-free and works beautifully for:
- Low carb lifestyles
- Keto eating plans
- Gluten sensitivities
- Lightened-up comfort food meals
And because it’s packed with vegetables, you’re adding extra nutrition without sacrificing flavor.
Serving Suggestions
This healthy homemade pizza pairs beautifully with:
- A crisp green salad with lemon vinaigrette
- Roasted vegetables
- Sparkling water with fresh citrus
- Simple tomato and cucumber salad
It’s perfect for:
- Weeknight dinners
- Meal prep
- Family pizza night
- Entertaining guests with dietary restrictions
Storage & Reheating
Store leftover slices in an airtight container in the refrigerator for up to 3 days.
To reheat:
- Use a 375°F oven for 5–8 minutes for best crispiness.
- Avoid microwaving if possible, as it softens the crust.
You can also freeze the pre-baked crust (without toppings). Wrap tightly and freeze for up to 2 months. Bake from frozen at 400°F until heated through before topping.
Common Mistakes to Avoid
- Not squeezing enough moisture
- Skipping parchment paper
- Overloading with heavy toppings
- Cutting immediately without resting
Follow the steps carefully and you’ll have a crust that holds together beautifully.
A Little Fun Food History
Cauliflower pizza crust became wildly popular in the 2010s during the low-carb and gluten-free food movement. As more people searched for alternatives to traditional wheat-based dough, creative home cooks discovered that cauliflower — when properly prepared — could mimic the structure of bread products surprisingly well.
What started as a trend quickly became a staple in many kitchens.
Today, cauliflower crust isn’t just for special diets. It’s a delicious option anyone can enjoy.
Final Thoughts
The BEST Cauliflower Pizza Crust (Gluten-Free & Sliceable!) proves that healthy eating doesn’t have to feel restrictive. It’s crisp, flavorful, satisfying, and sturdy enough to hold your favorite toppings.
Once you master the moisture-removal step, you’ll never worry about soggy crust again.
Pizza night just got a wholesome upgrade — and honestly, you might not even miss the traditional dough.