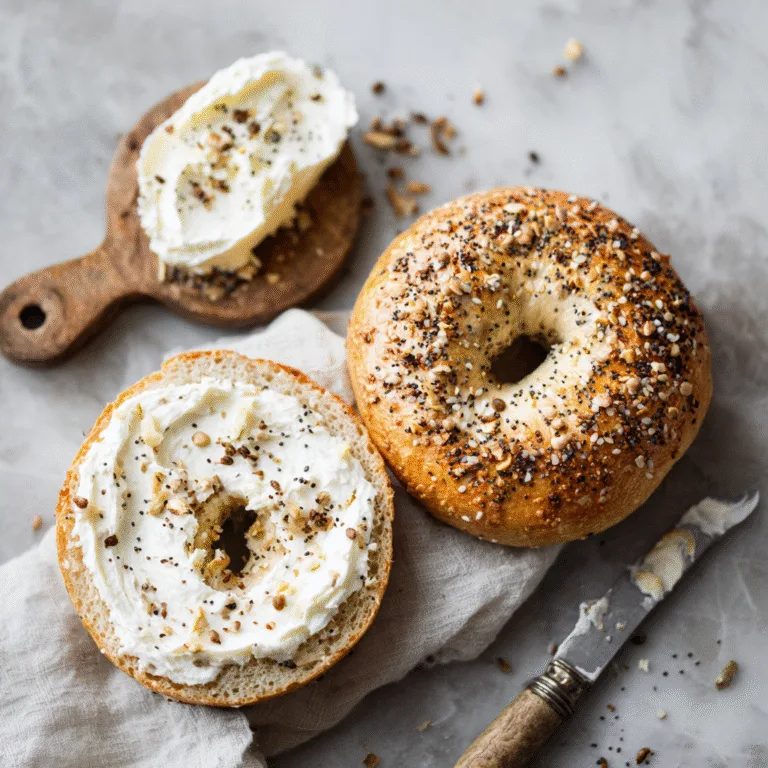
30 Minute Dinner Rolls: The Ultimate Quick Bread Recipe for Busy Home Cooks
There’s nothing quite like the aroma of freshly baked bread filling your kitchen, and these incredible 30-minute dinner rolls prove that you don’t need hours of rising time to achieve bakery-quality results at home. Perfect for last-minute dinner parties, weeknight family meals, or whenever you’re craving warm, fluffy bread, this revolutionary recipe transforms simple pantry ingredients into golden, pillowy rolls that will have everyone asking for seconds.
Whether you’re a seasoned baker or just starting your bread-making journey, these quick dinner rolls eliminate the intimidation factor typically associated with yeast breads. By using a unique rapid-rise technique combined with optimal ingredient temperatures, you’ll have fresh, homemade rolls on your table in just half an hour from start to finish.
The Science Behind Lightning-Fast Bread Making
Traditional bread recipes require multiple rising periods that can span several hours, but our 30-minute approach leverages specific temperature control and ingredient ratios to accelerate the fermentation process without compromising flavor or texture. The secret lies in creating the perfect environment for yeast activation while maintaining the delicate balance between speed and quality that makes these rolls extraordinarily soft and flavorful.
Active dry yeast becomes incredibly productive when exposed to precisely warmed liquid, typically between 105-110°F, which activates the microorganisms responsible for creating the carbon dioxide bubbles that give bread its characteristic rise. By combining this optimal temperature with a slightly higher yeast ratio and carefully measured ingredients, we can achieve remarkable results in a fraction of traditional time.

The addition of sugar feeds the yeast immediately, creating rapid fermentation, while the butter contributes to the tender crumb structure that makes these rolls irresistibly soft. Each ingredient plays a crucial role in this accelerated process, from the protein content in the flour providing structure to the salt controlling fermentation speed and enhancing overall flavor development.
Essential Ingredients for Perfect Quick Rolls
Creating exceptional 30-minute dinner rolls requires understanding how each component contributes to the final product, and using the right ingredients in precise proportions ensures consistent, professional results every time you bake.
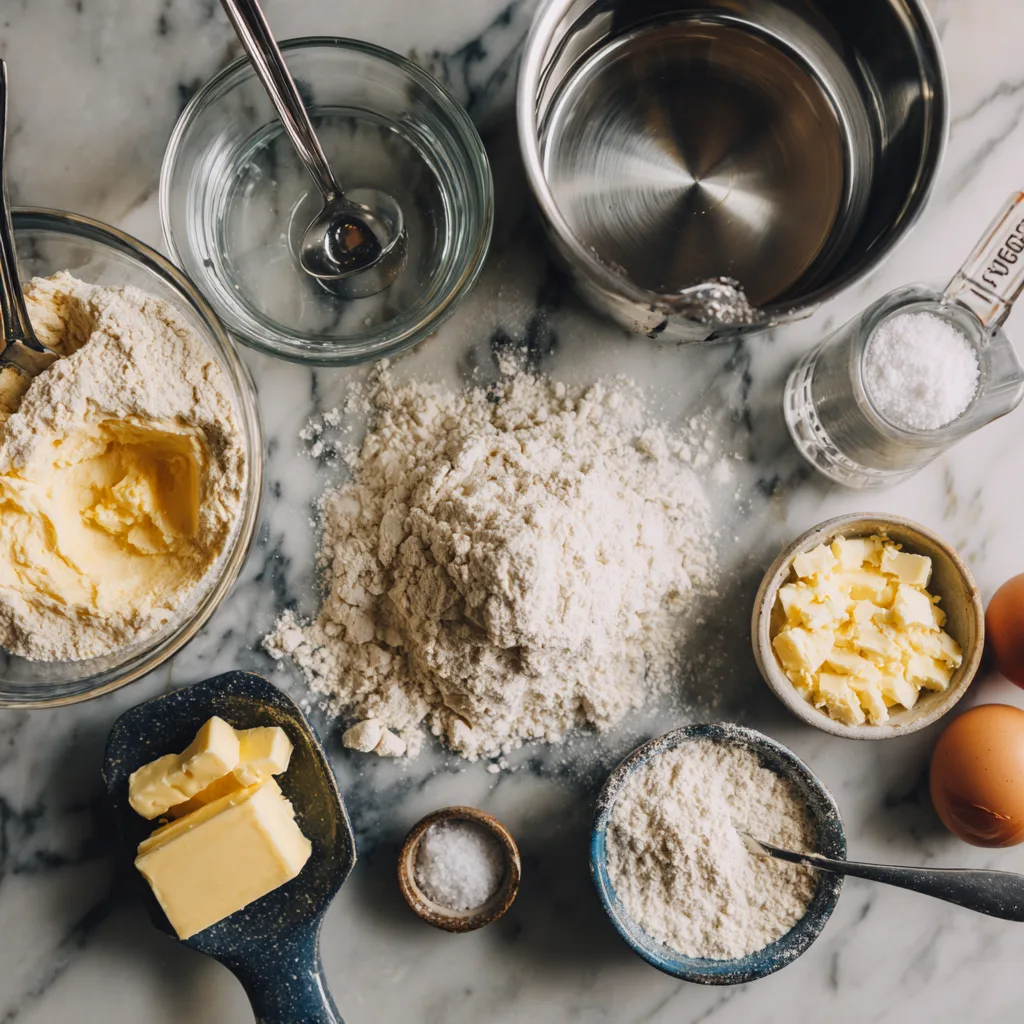
Ingredients:
- 3 cups all-purpose flour
- 1 packet (2¼ teaspoons) active dry yeast
- 1 tablespoon granulated sugar
- 1 teaspoon salt
- 1 cup warm water (105-110°F)
- 3 tablespoons melted butter
- 1 large egg
- Additional melted butter for brushing
High-quality all-purpose flour provides the ideal protein content for tender yet structured rolls, while active dry yeast ensures reliable rising power when properly activated. The sugar not only feeds the yeast but also contributes to the golden-brown color and subtle sweetness that makes these rolls so appealing to all ages.
Warm water temperature is absolutely critical – too hot will kill the yeast, while too cool won’t activate it properly, so using a kitchen thermometer eliminates guesswork and guarantees success. The melted butter adds richness and helps create the soft, tender crumb texture that distinguishes homemade rolls from store-bought alternatives.
Step-by-Step Instructions for Rapid Roll Success
Instructions:
- Preheat your oven to 400°F and lightly grease a 9×13 inch baking dish or large round pizza stone to ensure even heat distribution and prevent sticking.
- In a large mixing bowl, combine warm water, sugar, and active dry yeast, stirring gently until dissolved, then let stand for 5 minutes until the mixture becomes foamy and aromatic, indicating active yeast fermentation.
- Add melted butter, beaten egg, and salt to the yeast mixture, whisking until well combined and creating a smooth, homogeneous liquid base for the dough development.
- Gradually incorporate flour, one cup at a time, mixing with a wooden spoon or dough whisk until a soft, slightly sticky dough forms that pulls away from bowl sides but remains manageable for shaping.
- Turn dough onto a lightly floured surface and knead for 2-3 minutes until smooth and elastic, adding minimal additional flour only if necessary to prevent excessive sticking.
- Divide dough into 12 equal portions using a bench scraper or sharp knife, then roll each piece into a smooth ball by cupping your hand and rolling against the work surface with gentle circular motions.
- Arrange shaped rolls in prepared baking dish, spacing them close together so they touch slightly, which creates the characteristic soft sides and helps them rise together uniformly.
- Cover with a clean kitchen towel and let rise in a warm location for 10-12 minutes until noticeably puffed and increased in size by approximately 50 percent.
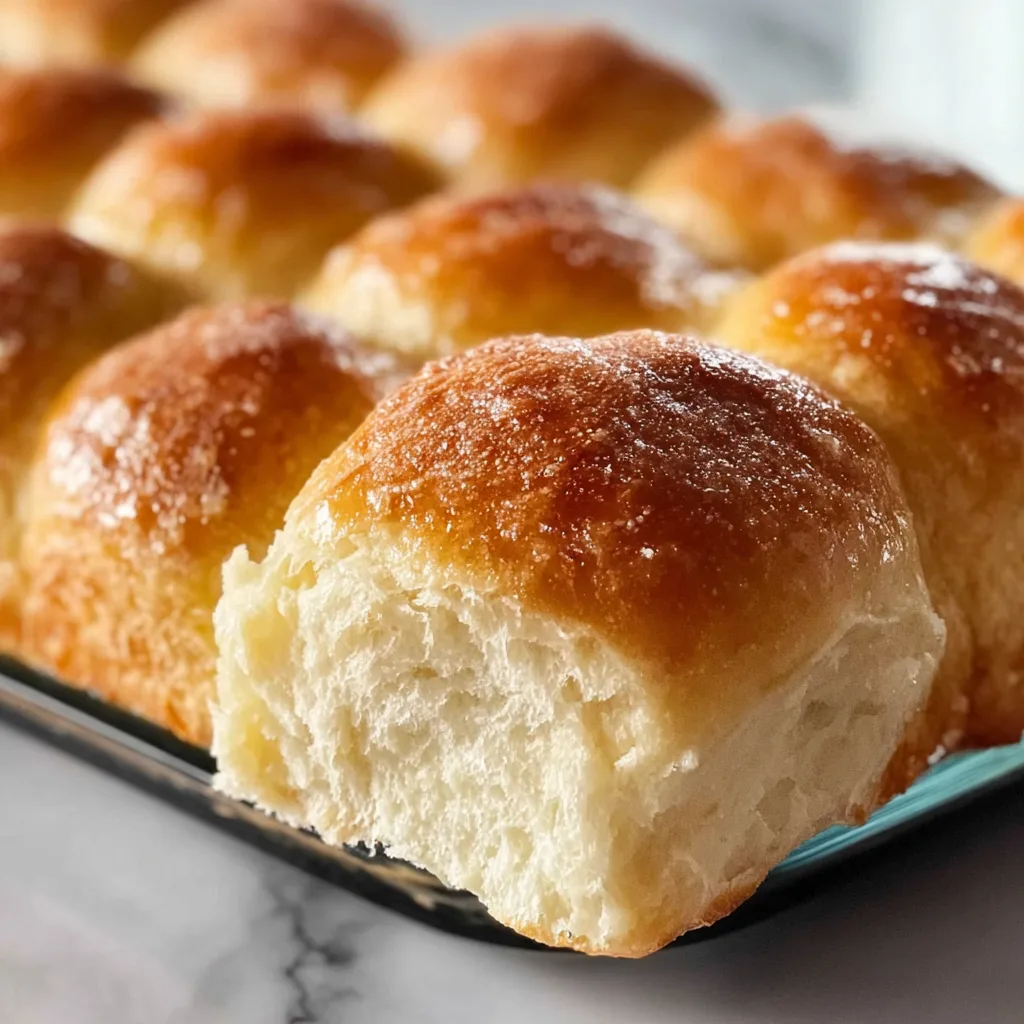
- Brush tops generously with melted butter and bake for 12-15 minutes until golden brown and hollow-sounding when tapped, rotating pan once halfway through for even browning.
- Remove from oven and immediately brush with additional melted butter while still warm, then serve immediately or cool on a wire rack for later use.
30 Minute Dinner Rolls
Ingredients
Equipment
Method
- Preheat oven to 400°F and lightly grease a 9×13 inch baking dish.
- In a large bowl, combine warm water, sugar, and yeast. Let stand 5 minutes until foamy.
- Add melted butter, beaten egg, and salt to yeast mixture, whisking until combined.
- Gradually add flour, one cup at a time, mixing until soft, slightly sticky dough forms.
- Turn onto floured surface and knead 2-3 minutes until smooth and elastic.
- Divide dough into 12 equal portions and roll each into smooth balls.
- Arrange rolls in prepared baking dish, touching slightly. Cover and rise 10-12 minutes.
- Brush tops with melted butter and bake 12-15 minutes until golden brown.
- Remove from oven and brush with additional butter while warm. Serve immediately.
Notes
Pro Tips for Consistently Amazing Results
Mastering the art of quick dinner rolls requires attention to several key details that can make the difference between good and exceptional results, and these professional techniques will elevate your baking success rate dramatically.
Temperature control remains the most critical factor throughout the entire process, from activating the yeast with properly warmed water to maintaining consistent oven temperature for even baking. Using an instant-read thermometer eliminates guesswork and ensures optimal conditions for rapid yeast development.
Timing is equally important – while these rolls bake quickly, monitoring the rising process prevents over-proofing, which can result in collapsed or dense texture. The dough should feel slightly warm and spring back lightly when gently pressed, indicating proper fermentation without excessive gas development.
Proper shaping technique creates uniform rolls that bake evenly and present beautifully on your dinner table. Rolling each portion into a tight ball with smooth surface tension helps maintain shape during rising and creates the classic dinner roll appearance that looks professionally made.
Troubleshooting Common Quick Roll Challenges
Even with a foolproof recipe, occasional issues can arise when making rapid-rise dinner rolls, but understanding common problems and their solutions ensures consistent success with every batch you bake.
Dense or heavy rolls typically result from using water that’s too hot, which kills the yeast, or flour that’s been packed too tightly during measuring, creating an overly stiff dough. Always measure flour by spooning it lightly into measuring cups and leveling with a knife for accurate proportions.
Rolls that don’t rise properly usually indicate inactive yeast, either from expired product or water temperature issues, so always check expiration dates and verify water temperature with a thermometer before proceeding with the recipe.
Uneven browning can occur from oven hot spots or incorrect rack positioning, so placing the baking dish on the center rack and rotating once during baking promotes uniform color development and prevents burning on one side.
Creative Variations and Flavor Enhancements
While classic dinner rolls are perfect as written, numerous variations can transform this basic recipe into exciting flavor combinations that complement different meals and occasions throughout the year.
Herb-infused rolls become elegant accompaniments to roasted meats by incorporating dried rosemary, thyme, or Italian seasoning into the flour mixture, while garlic powder and dried parsley create savory rolls perfect for pasta dinners.
Sweet variations work wonderfully for breakfast or brunch by adding cinnamon to the dough and brushing finished rolls with honey butter, or incorporating orange zest for bright citrus notes that pair beautifully with coffee or tea.
Cheese lovers can fold shredded cheddar, parmesan, or herb cheese into the dough during mixing, creating rich, savory rolls that stand alone as satisfying snacks or enhance soup and salad meals with added protein and calcium.
Storage and Reheating Guidelines
Proper storage techniques ensure your homemade dinner rolls maintain their fresh taste and soft texture for several days after baking, while effective reheating methods restore their just-baked warmth and appeal.
Store completely cooled rolls in airtight containers or zip-top bags at room temperature for up to three days, or freeze individually wrapped rolls for up to three months, labeling with baking date for optimal freshness tracking.
Reheating frozen rolls requires thawing at room temperature for 30 minutes, then warming in a 300°F oven for 5-7 minutes until heated through, while fresh rolls need only 2-3 minutes of gentle oven warming to restore their original texture.
Microwave reheating works for individual rolls but requires careful timing – 10-15 seconds per roll prevents overheating that creates tough, chewy texture, and placing a damp paper towel alongside helps maintain moisture during the warming process.
Perfect Pairing Suggestions and Serving Ideas
These versatile 30-minute dinner rolls complement virtually any meal, but certain combinations create particularly memorable dining experiences that showcase their tender texture and subtle flavor profile.
Classic comfort food pairings include serving warm rolls alongside hearty stews, roasted chicken dinners, or holiday feasts where the bread helps balance rich gravies and substantial protein dishes while providing satisfying carbohydrates.
International cuisine benefits from these neutral-flavored rolls as well – they absorb curry sauces beautifully, complement Italian pasta dishes without competing with complex flavor profiles, and provide perfect vehicles for Mediterranean dips and spreads.
Breakfast and brunch applications transform these rolls into morning treats by serving them warm with butter and jam, using them as sandwich bases for eggs and bacon, or splitting and toasting them like English muffins for versatile meal foundations.
Nutritional Benefits and Dietary Considerations
Understanding the nutritional profile of homemade dinner rolls helps you make informed decisions about incorporating them into balanced meal plans while maximizing their contribution to overall dietary wellness.
Each roll provides approximately 180 calories with balanced macronutrients including complex carbohydrates for sustained energy, moderate protein from flour and eggs, and minimal fat primarily from butter additions that enhance flavor and texture.
Homemade versions offer significant advantages over commercial alternatives by eliminating preservatives, controlling sodium content, and using fresh, high-quality ingredients that contribute to better overall nutrition and digestive comfort.
Dietary modifications accommodate various needs – substituting whole wheat flour increases fiber content, while dairy-free butter alternatives create suitable options for lactose-intolerant individuals without significantly impacting final texture or taste.
Conclusion: Mastering the Art of Quick Homemade Bread
These remarkable 30-minute dinner rolls prove that exceptional homemade bread doesn’t require extensive time commitments or professional baking skills, making fresh, warm rolls accessible for busy home cooks who refuse to compromise on quality and flavor.
By mastering this fundamental technique, you’ll gain confidence to experiment with variations, adapt recipes to personal preferences, and create memorable dining experiences that bring families together around tables filled with the incomparable aroma and taste of fresh-baked bread.
The satisfaction of serving homemade rolls, combined with the practical benefits of rapid preparation, makes this recipe an invaluable addition to your culinary repertoire that will serve you well for countless meals and special occasions throughout the years ahead.