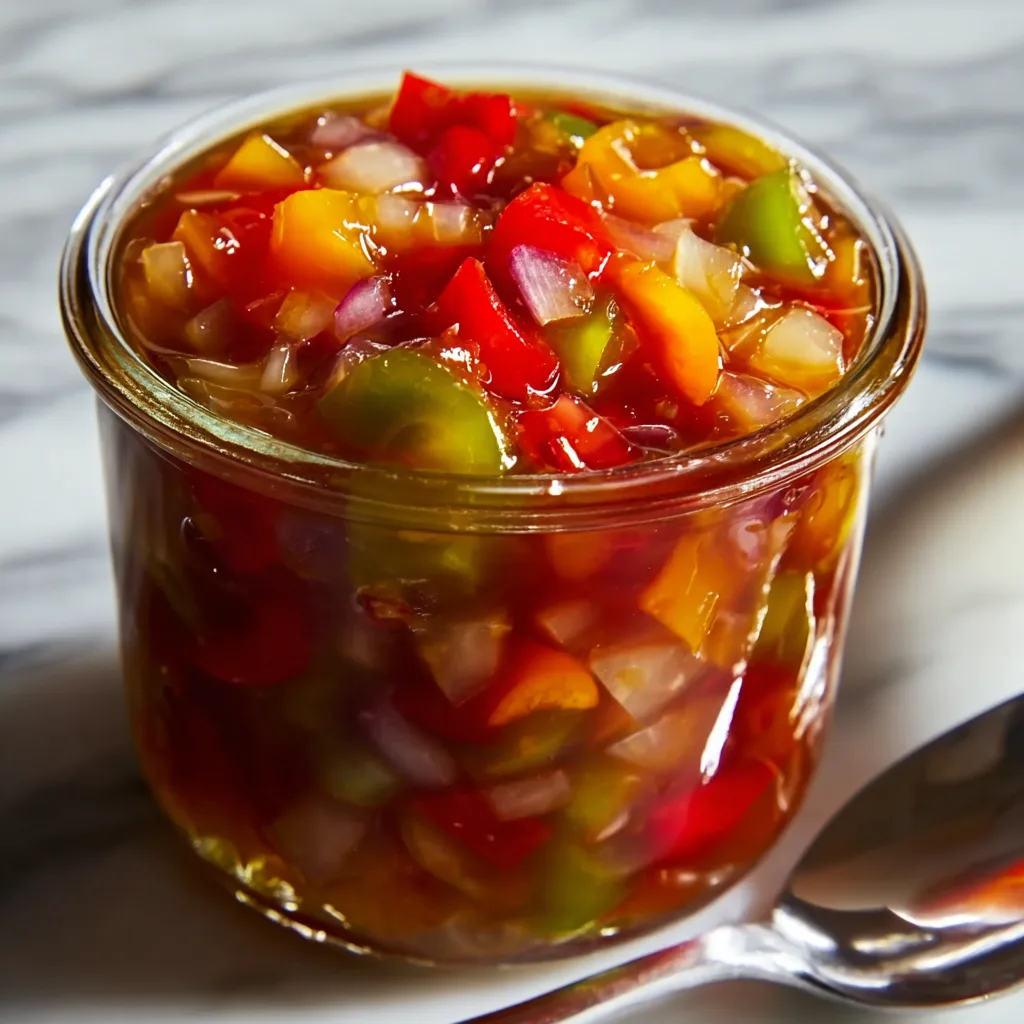
Pickled Pepper and Onion Relish – Sweet, Tangy, and Perfect for Everything!
If you love bold, zesty flavors that elevate any dish from ordinary to unforgettable, this Pickled Pepper and Onion Relish recipe is your new favorite condiment. Sweet, tangy, and packed with crunch, this relish balances the natural sweetness of onions and bell peppers with the bright acidity of vinegar — creating a condiment that’s as beautiful as it is flavorful.
Whether you spread it on burgers, spoon it over grilled chicken, mix it into tuna salad, or pair it with cheese and crackers, this relish adds instant brightness and depth to your meals. It’s also perfect for canning or gifting — because who doesn’t love a homemade jar of something delicious?
Let’s explore how to make this colorful, crave-worthy relish from scratch!
What Is Pickled Pepper and Onion Relish?
Pickled pepper and onion relish is a sweet-and-sour condiment made from thinly sliced bell peppers, onions, sugar, vinegar, and salt. It’s cooked down slightly, allowing the vegetables to soften while maintaining their crunch. The resulting mixture is glossy, tangy, and full of vibrant color — an ideal topping for savory dishes.

This relish is inspired by classic southern recipes often served with hot dogs, sausages, and barbecue. It’s simple, versatile, and can be stored for months when canned properly.
Why You’ll Love This Relish
- Bright and Tangy Flavor: The balance of sweet and tart makes every bite pop.
- Versatile Condiment: Delicious on burgers, sandwiches, grilled meats, and even charcuterie boards.
- Easy to Make: Just slice, simmer, and cool — no complicated steps required.
- Perfect for Canning: Keeps beautifully when sealed in sterilized jars.
- Customizable: Adjust sweetness or heat to your liking with different pepper varieties.
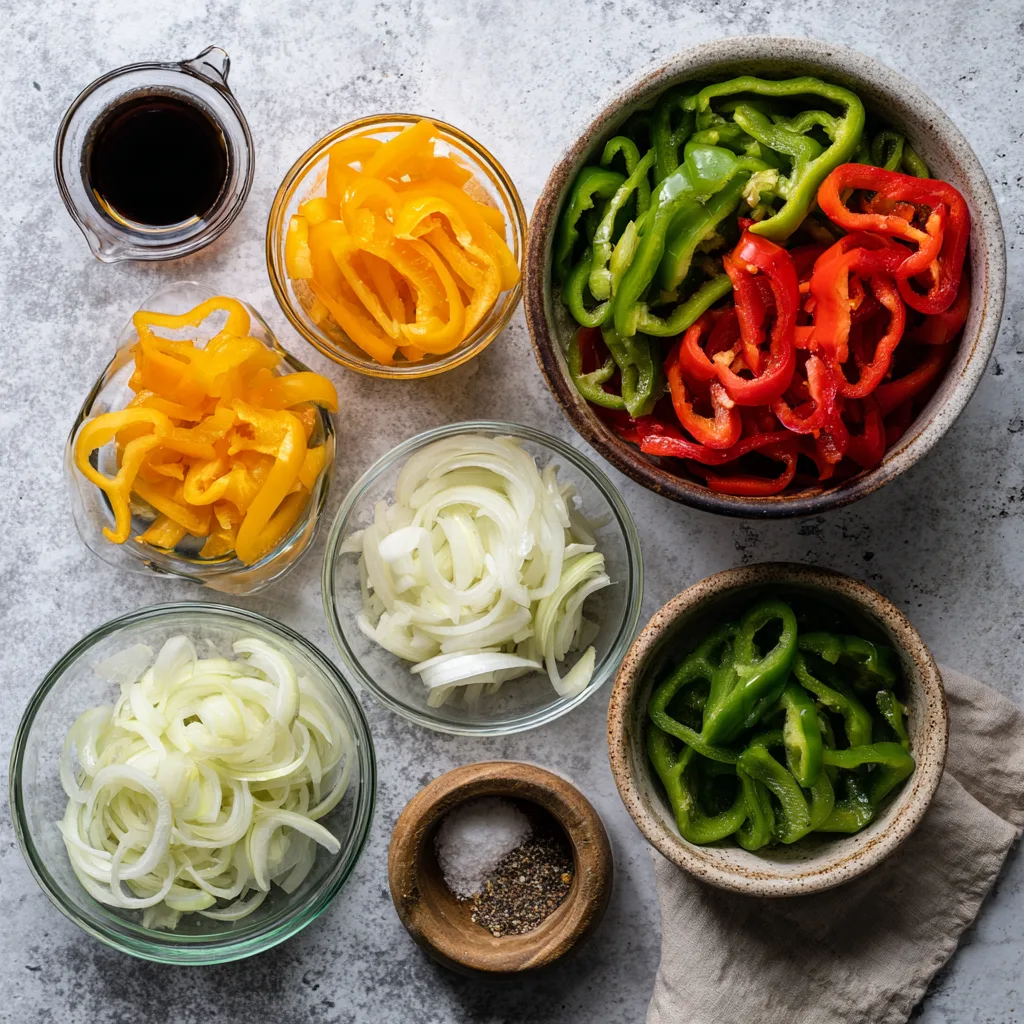
Ingredients for Pickled Pepper and Onion Relish
Here’s what you’ll need to make this flavorful relish:
- 3 red bell peppers, finely sliced
- 2 yellow bell peppers, finely sliced
- 1 green bell pepper, finely sliced
- 2 medium yellow onions, thinly sliced
- 2 cups white vinegar (5% acidity)
- 1 ½ cups granulated sugar
- 1 teaspoon salt
- 1 teaspoon mustard seeds (optional)
- ½ teaspoon celery seed (optional)
- 1 clove garlic, minced (optional)
This combination gives you the perfect sweet-tangy balance, with a subtle spice that complements both meats and vegetables.
Instructions
1. Prepare the Vegetables
Wash and slice the bell peppers and onions into thin strips. The more evenly you slice them, the more consistent your relish will look and cook.
2. Combine Ingredients
In a large pot, combine vinegar, sugar, and salt. Stir over medium heat until the sugar dissolves completely. Add mustard seeds, celery seed, and minced garlic if using.
3. Add the Peppers and Onions
Add all the sliced vegetables to the vinegar mixture. Stir to coat them evenly in the brine.
4. Simmer
Bring the mixture to a gentle simmer over medium-low heat. Cook for 10–15 minutes, stirring occasionally, until the peppers and onions soften slightly but still retain a bit of crunch.
5. Cool and Jar
Remove from heat and let the relish cool slightly. Ladle it into sterilized jars, ensuring the vegetables are submerged in the brine. Seal with lids and let cool to room temperature.
6. Store or Can
For refrigerator storage, let the jars cool completely and refrigerate for up to 3 months.
If canning, process in a boiling water bath for 10 minutes to ensure shelf stability.
Pickled Pepper and Onion Relish
Ingredients
Equipment
Method
- Combine vinegar, sugar, and salt in a large pot and bring to a gentle simmer.
- Add sliced peppers, onions, and optional seasonings.
- Simmer for 10–15 minutes until vegetables soften slightly.
- Cool slightly, then ladle into sterilized jars.
- Seal jars and refrigerate or process in a boiling water bath for 10 minutes.
Notes
Tips for the Best Pickled Pepper Relish
- Slice Evenly: Uniform slices ensure even pickling and a prettier presentation.
- Use Fresh Ingredients: The crispness of your vegetables makes all the difference.
- Control the Sweetness: For a less sweet relish, reduce the sugar by ½ cup.
- Spice It Up: Add jalapeños or red pepper flakes for a kick.
- Let It Sit: For the best flavor, allow the relish to rest in the fridge for 24 hours before serving.
Flavor Variations
1. Spicy Jalapeño Relish
Swap one green bell pepper for two jalapeños to give your relish a fiery edge.
2. Honey Pickled Pepper Relish
Replace half the sugar with honey for a naturally sweet, floral touch.
3. Apple Cider Vinegar Twist
Use apple cider vinegar instead of white vinegar for a more rounded, mellow flavor.
4. Garden Herb Relish
Add a few sprigs of fresh thyme or rosemary to the brine for an aromatic variation.
5. Roasted Pepper Relish
Char the peppers under a broiler before slicing to add a smoky depth to the final flavor.
How to Serve Pickled Pepper and Onion Relish
This relish is incredibly versatile! Try it in these delicious ways:
- On Burgers and Hot Dogs: A perfect substitute for traditional pickle relish.
- With Cheese Boards: Pair with sharp cheddar, goat cheese, or brie.
- On Grilled Meats: Spoon over chicken, pork chops, or sausages for a bright contrast.
- In Sandwiches: Add to turkey or ham sandwiches for extra flavor.
- With Roasted Veggies: Toss with roasted zucchini or eggplant for a tangy twist.
- Gift It: Tie a ribbon around a mason jar and gift it as a homemade edible present.
Storage and Shelf Life
- Refrigerator: Keeps up to 3 months in airtight jars.
- Canned: When processed correctly in a water bath, it lasts up to 12 months in a cool, dark place.
- Freezer (short-term): Freeze cooled relish in small containers for up to 3 months; thaw in the fridge before use.
Fun Fact: The Origins of Relish
Relish has roots in ancient India and Persia, where pickling vegetables in vinegar and spices was a way to preserve the harvest. European immigrants later brought these techniques to North America, where they evolved into the sweet, tangy relishes we know today. Adding peppers to onion relish became especially popular in the southern United States, where bright, bold flavors dominate regional cuisine.
Troubleshooting Guide
- Too Watery? Simmer longer to reduce the liquid slightly.
- Too Tangy? Add an extra tablespoon of sugar to balance acidity.
- Too Sweet? Add a splash of vinegar or a pinch of salt.
- Pale Color? Use colorful bell peppers — red, yellow, and orange — for vibrance.
Nutrition (per 2 tablespoons)
- Calories: 35
- Carbohydrates: 8g
- Protein: 0g
- Fat: 0g
- Sodium: 70mg
- Sugar: 7g
- Vitamin C: 15%
Why Homemade Relish Is Worth It
Homemade relish offers something you can’t find in a jar at the grocery store: fresh flavor, real texture, and total control. You choose your ingredients, your sweetness, your spice level, and your vinegar type. Plus, it makes your fridge or pantry feel instantly more gourmet — a single spoonful can transform a sandwich or grilled dish into something restaurant-worthy.
Making a batch of Pickled Pepper and Onion Relish also fills your kitchen with the most inviting aroma — sweet vinegar and caramelized onion mingling with fresh peppers. It’s one of those simple pleasures that reminds you how rewarding homemade food can be.