Soft & Fluffy Old-Fashioned Yeast Rolls Recipe
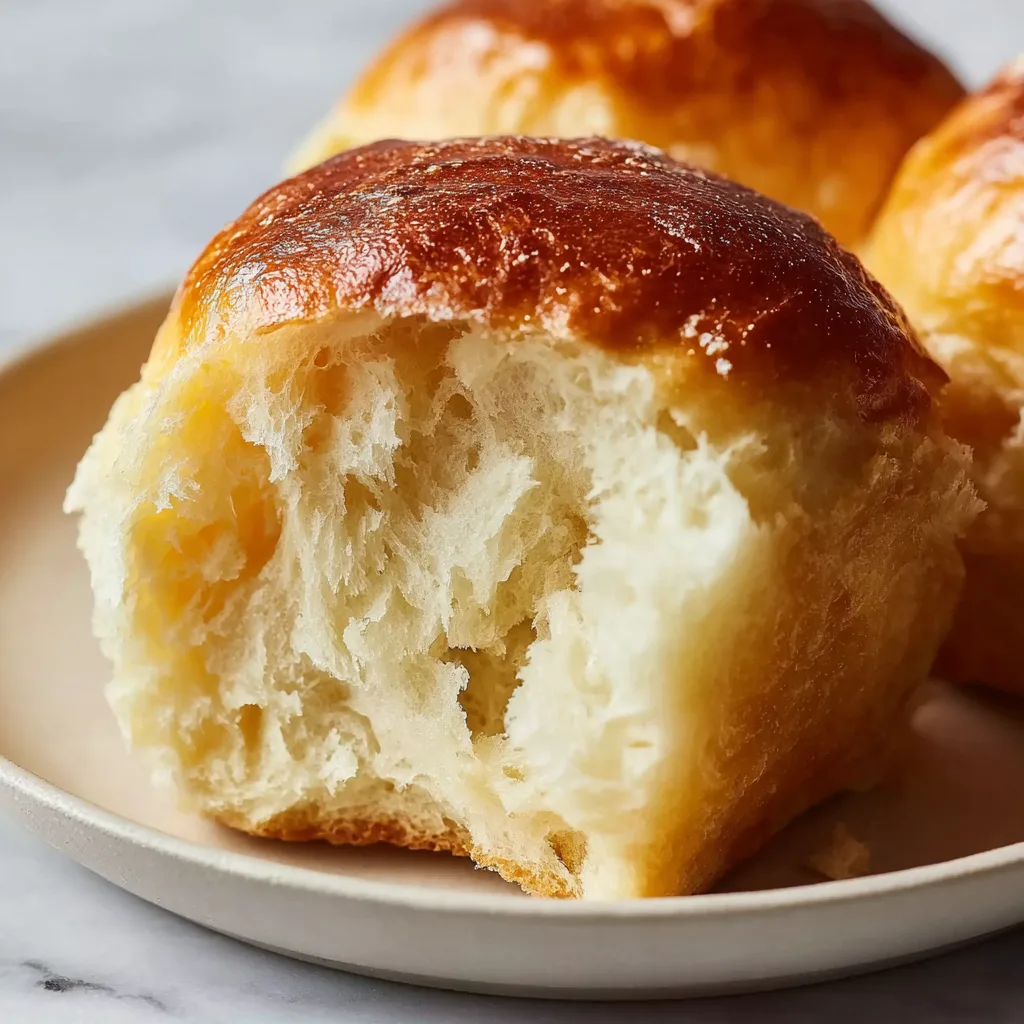
Nothing beats the aroma of freshly baked yeast rolls wafting through your kitchen. These soft and fluffy old-fashioned yeast rolls are the perfect addition to any meal, whether you’re hosting a holiday dinner, preparing a weeknight family meal, or simply wanting to enjoy the satisfaction of homemade bread. With their golden-brown exterior and pillowy-soft interior, these classic dinner rolls will transport you back to grandmother’s kitchen with every bite.
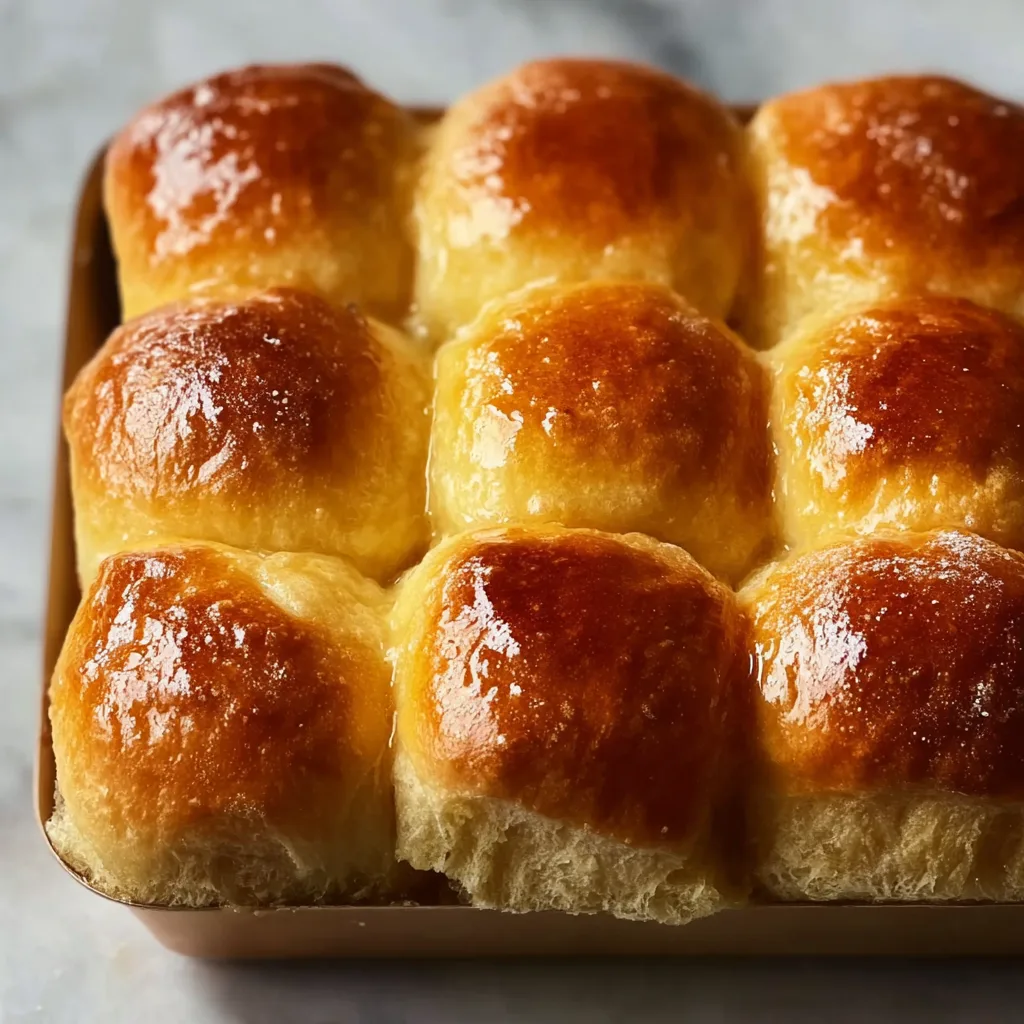
This traditional yeast roll recipe has been passed down through generations, refined over time to create the perfect balance of flavor, texture, and simplicity. Unlike store-bought rolls that often lack character and freshness, these homemade beauties offer superior taste and the unmistakable satisfaction that comes from creating something wonderful with your own hands.
The Magic Behind Perfect Yeast Rolls
Creating exceptional yeast rolls requires understanding the science behind bread making. Yeast is a living organism that feeds on sugars and produces carbon dioxide gas, which creates those delightful air pockets that make rolls light and fluffy. The key to success lies in creating the perfect environment for yeast activation – warm temperatures, proper hydration, and adequate time for fermentation.
Temperature control plays a crucial role in yeast roll success. Too hot, and you’ll kill the yeast; too cold, and fermentation slows dramatically. The ideal temperature for activating yeast ranges between 105-115°F, creating optimal conditions for those microscopic workers to do their magic. This recipe incorporates foolproof techniques that ensure consistent results, even for novice bakers.
The beauty of old-fashioned yeast rolls lies in their versatility and forgiving nature. These rolls can be shaped into various forms, from classic round dinner rolls to elegant knots or festive braids. They freeze beautifully, making them perfect for meal prep or special occasions when you want homemade bread without last-minute stress.
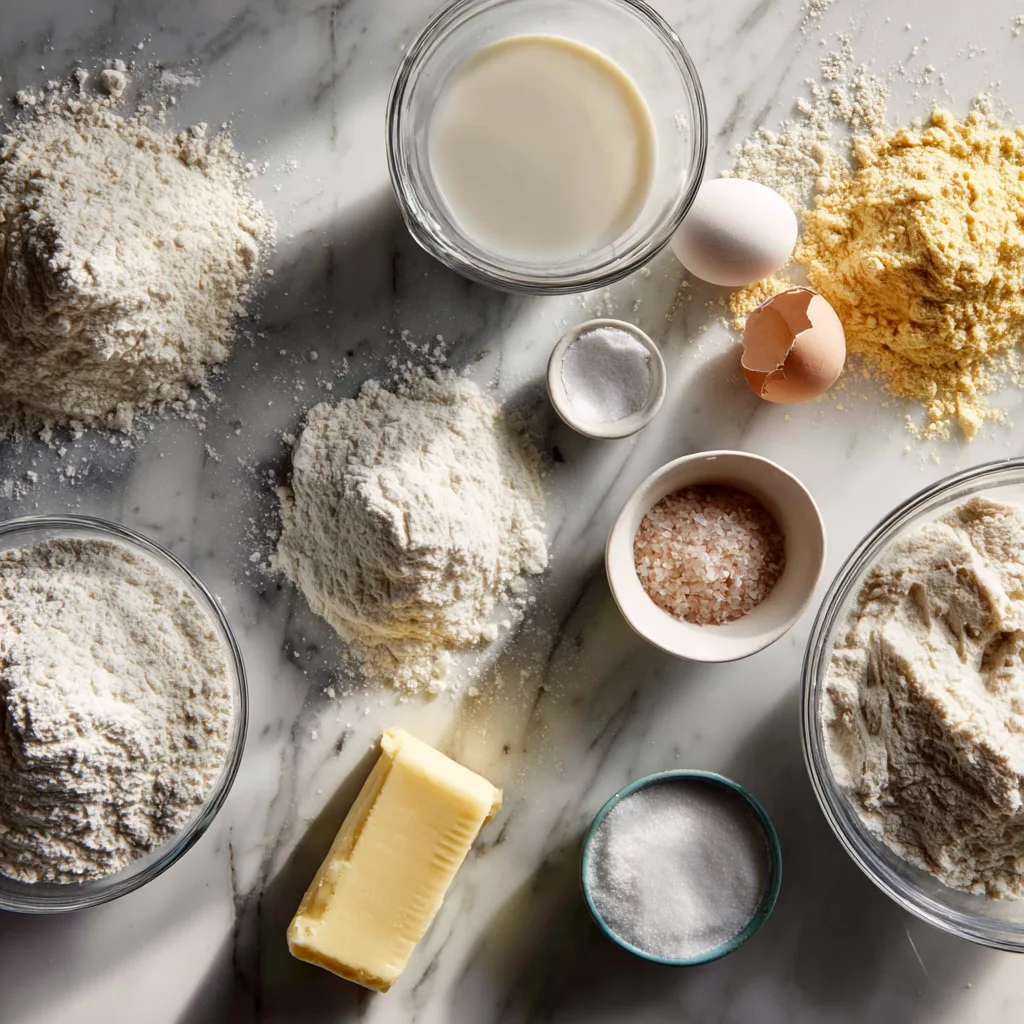
Essential Ingredients for Success
Quality ingredients form the foundation of exceptional yeast rolls. All-purpose flour provides the perfect protein content for tender yet structured rolls, while active dry yeast ensures reliable rising power. Fresh ingredients make a noticeable difference – always check expiration dates on yeast, as inactive yeast will result in dense, heavy rolls.
Butter adds richness and flavor while contributing to the tender crumb structure. Using real butter rather than margarine creates superior taste and texture. The milk should be warmed to the proper temperature for yeast activation, and using whole milk rather than skim produces richer, more flavorful rolls.
Sugar serves multiple purposes in this recipe – it feeds the yeast for proper fermentation, adds subtle sweetness, and contributes to the beautiful golden-brown color during baking. Salt enhances flavor and controls yeast activity, preventing over-fermentation that could result in collapsed rolls.
Ingredients
- 4 cups all-purpose flour
- 1 packet (2¼ teaspoons) active dry yeast
- 1 cup warm milk (105-115°F)
- ¼ cup granulated sugar
- ¼ cup unsalted butter, softened
- 1 large egg
- 1 teaspoon salt
- 2 tablespoons melted butter for brushing
Instructions
- In a large mixing bowl, dissolve yeast and 1 tablespoon sugar in warm milk. Let stand for 5-10 minutes until foamy and bubbly.
- Add remaining sugar, softened butter, egg, and salt to the yeast mixture. Stir until well combined.
- Gradually add 3 cups of flour, mixing with a wooden spoon until a soft dough forms. Add remaining flour as needed to create a slightly sticky but manageable dough.
- Turn dough onto a floured surface and knead for 8-10 minutes until smooth and elastic. The dough should be soft and slightly tacky but not sticky.
- Place dough in a greased bowl, turning once to coat all sides. Cover with a damp cloth and let rise in a warm place for 1-1.5 hours until doubled in size.
- Punch down risen dough and turn onto a lightly floured surface. Divide into 12-15 equal portions and shape into smooth balls.
- Place shaped rolls on a greased baking sheet or in a 9×13 inch baking pan, leaving space between each roll. Cover and let rise for 30-45 minutes until nearly doubled.
- Preheat oven to 375°F (190°C). Brush tops of rolls with melted butter.
- Bake for 15-18 minutes until golden brown on top and cooked through. Internal temperature should reach 190°F.
- Remove from oven and brush immediately with additional melted butter for extra softness and shine.
Soft & Fluffy Old-Fashioned Yeast Rolls
Ingredients
Equipment
Method
- In a large mixing bowl, dissolve yeast and 1 tablespoon sugar in warm milk. Let stand for 5-10 minutes until foamy.
- Add remaining sugar, softened butter, egg, and salt to the yeast mixture. Stir until well combined.
- Gradually add 3 cups of flour, mixing until a soft dough forms. Add remaining flour as needed.
- Turn dough onto floured surface and knead for 8-10 minutes until smooth and elastic.
- Place dough in greased bowl, cover with damp cloth and let rise for 1-1.5 hours until doubled.
- Punch down dough and divide into 12-15 equal portions. Shape into smooth balls.
- Place rolls on greased baking sheet, cover and let rise for 30-45 minutes until nearly doubled.
- Preheat oven to 375°F. Brush roll tops with melted butter and bake for 15-18 minutes until golden brown.
Notes
Master Baker’s Tips for Perfect Results
Achieving bakery-quality yeast rolls at home requires attention to detail and proper technique. Always proof your yeast before proceeding with the recipe – the mixture should become foamy and fragrant within 10 minutes. If nothing happens, your yeast may be inactive, and you’ll need to start over with fresh yeast.
Kneading develops gluten structure, which gives rolls their texture and ability to trap gas from fermentation. Proper kneading should result in smooth, elastic dough that springs back when poked. Under-kneaded dough produces dense rolls, while over-kneading can make them tough.
Creating the ideal rising environment ensures consistent results. A slightly warm oven (turned off) with the light on, or a sunny windowsill, provides perfect conditions. Avoid drafty areas or temperatures above 80°F, which can cause too-rapid rising and poor flavor development.
Customization and Flavor Variations
These versatile yeast rolls serve as an excellent base for countless variations. Incorporate herbs like rosemary, thyme, or oregano into the dough for savory dinner rolls perfect alongside roasted meats. Adding minced garlic and parmesan cheese creates irresistible garlic rolls that disappear quickly from any table.
For sweet variations, consider adding cinnamon and a touch of vanilla extract to create breakfast rolls. Orange zest and a light glaze transform these into elegant brunch treats. During holidays, incorporate seasonal spices like nutmeg or cardamom for festive appeal.
Shape variations add visual interest and practical benefits. Traditional round rolls work perfectly for sandwiches, while crescent shapes create elegant presentation for special dinners. Braided rolls or knots showcase your baking skills and create conversation pieces for entertaining.
Storage and Make-Ahead Strategies
Proper storage maintains freshness and extends the life of your homemade rolls. Store completely cooled rolls in airtight containers at room temperature for up to three days. For longer storage, freeze individually wrapped rolls for up to three months. Thaw at room temperature and warm briefly in the oven to restore freshness.
These rolls excel as make-ahead options for busy schedules or special events. Prepare dough through the first rise, then refrigerate overnight. Remove from refrigerator, shape rolls, and proceed with second rise and baking. This method actually improves flavor development through slow fermentation.
For ultimate convenience, fully baked rolls can be frozen and reheated as needed. Wrap cooled rolls individually in plastic wrap, then store in freezer bags. Reheat directly from frozen in a 350°F oven for 10-12 minutes until warmed through.
Troubleshooting Common Issues
Dense, heavy rolls typically result from inactive yeast, insufficient rising time, or too much flour. Always proof yeast before using and ensure rising environments maintain proper temperature. Add flour gradually during mixing to avoid over-flouring the dough.
Rolls that fail to rise properly often indicate yeast problems or temperature issues. Check yeast expiration dates and verify milk temperature with a thermometer. Rising times vary with ambient temperature and humidity – patience often solves rising problems.
Pale, under-baked rolls may need additional oven time or higher baking temperature. Use an instant-read thermometer to ensure internal temperature reaches 190°F. Brush with melted butter during the final minutes of baking to enhance browning.
The Perfect Pairing Guide
These versatile rolls complement countless menu options throughout the year. During autumn, serve alongside hearty soups, roasted vegetables, and comfort foods. Their mild flavor and soft texture provide perfect contrast to bold, seasoned dishes.
Holiday meals benefit enormously from fresh homemade rolls. They pair beautifully with traditional turkey, ham, or roast beef, soaking up delicious gravies and sauces. Consider making extra rolls for day-after turkey sandwiches – they’re absolutely perfect for using thanksgiving leftovers.
Everyday meals become special with the addition of warm, homemade rolls. They transform simple weeknight dinners into memorable family experiences and show care and effort that everyone appreciates.
Conclusion: Creating Lasting Memories
Making soft and fluffy old-fashioned yeast rolls represents more than just baking bread – it’s about creating experiences, traditions, and memories that last a lifetime. The process itself becomes meditative and rewarding, connecting us to generations of bakers who understood that the best meals come from the heart and hands of home cooks.
These rolls embody everything wonderful about homemade bread: the satisfaction of working with yeast, the anticipation during rising, and the incredible aroma that fills your kitchen during baking. They remind us that some things simply cannot be rushed or purchased – they must be made with time, care, and attention to detail.
Whether you’re continuing a family tradition or starting a new one, these old-fashioned yeast rolls will quickly become a cherished part of your recipe collection, bringing warmth, comfort, and connection to every meal they grace.