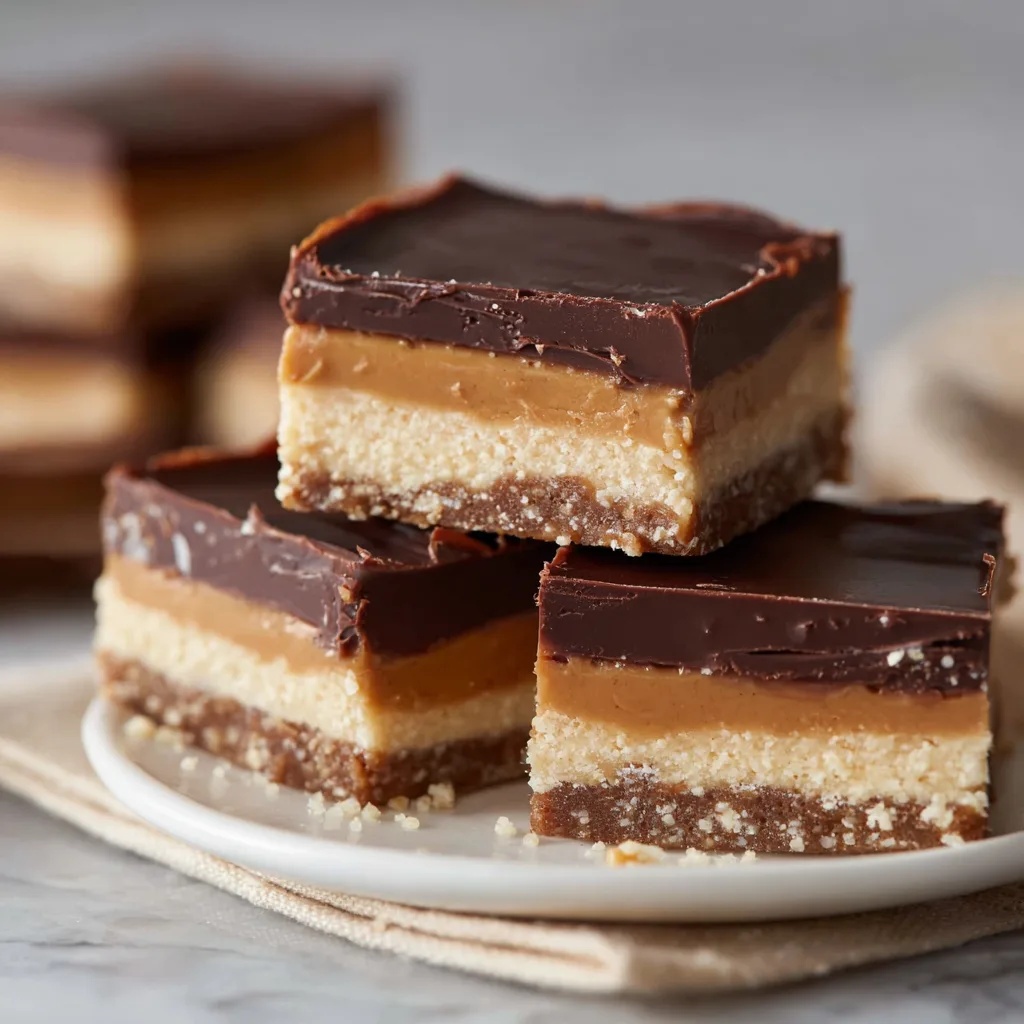
The Best Buckeye Bars Recipe (No Bake, Ultra Creamy, Perfect Every Time!)
If you love the classic combination of peanut butter and chocolate, then The Best Buckeye Bars Recipe is about to become your new obsession. Inspired by the iconic Ohio “Buckeye” candy — creamy peanut butter filling dipped into rich chocolate — these bars deliver everything you adore in a faster, easier, and more crowd-friendly form. No rolling, no dipping, no mess. Just smooth layers, perfect slices, and melt-in-your-mouth bliss in every bite.
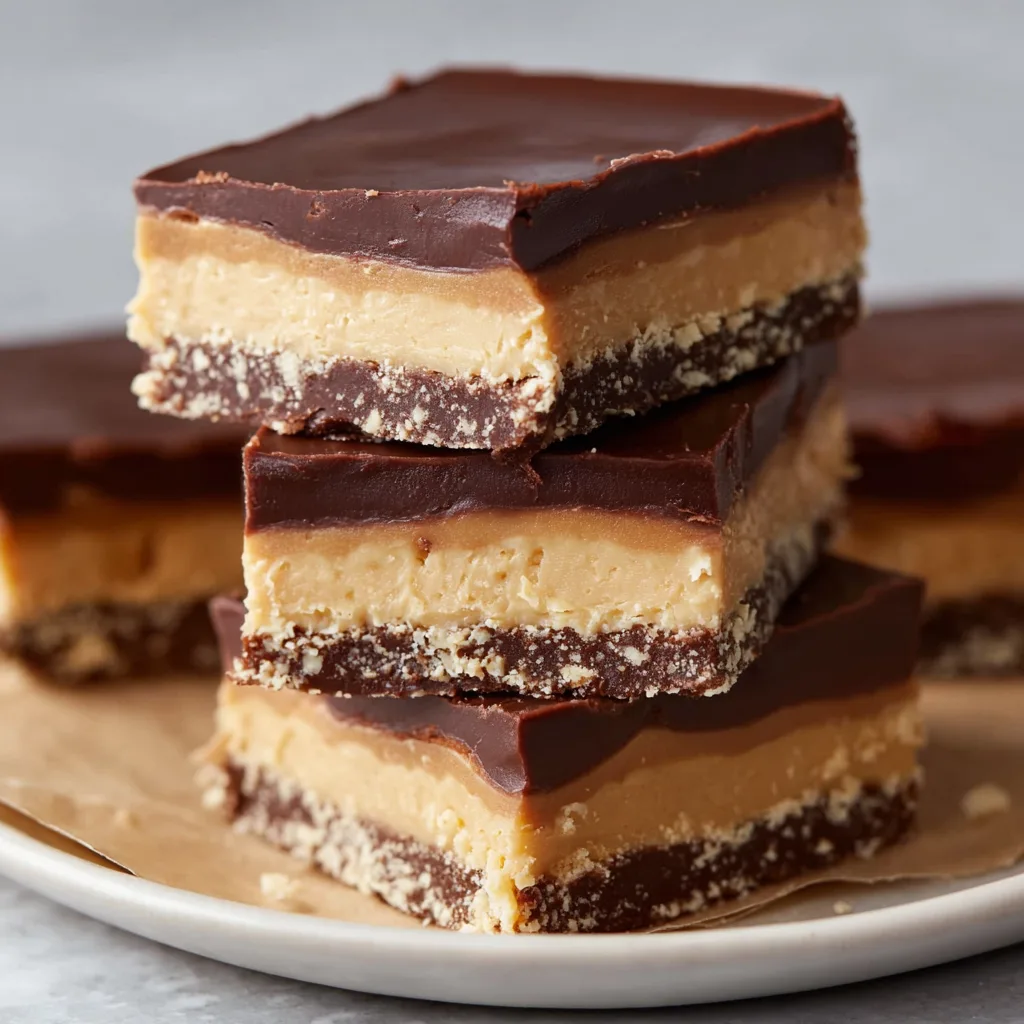
Buckeye bars became popular because they turn a time-consuming candy into a simple dessert that anyone can make. When the holidays roll around, or when you need a dessert that wins every potluck, this recipe delivers every time. The peanut butter layer is thick, creamy, and soft without being sticky. The chocolate topping sets with the perfect snap but still melts when you take a bite. And since this is a no-bake dessert, it’s nearly foolproof — ideal for beginners and seasoned bakers alike.
In this fully original, SEO-optimized recipe article, you’ll learn how to make the best buckeye bars with zero fuss, no fancy equipment, and ingredients you probably already have. Let’s dig in.
⭐ Why This Buckeye Bars Recipe Is the Best
- No bake — perfect for hot days or busy weeks.
- Thicker layers for a more satisfying bite than traditional buckeyes.
- Smooth, creamy peanut butter base that never crumbles.
- Glossy chocolate top that slices cleanly without cracking.
- Portable and potluck-friendly — these travel beautifully.
- Short ingredient list with no complicated steps.
Whether you’re prepping for Christmas, a school event, a birthday, or just a snack for movie night, this recipe truly never fails.
⭐ Ingredients You’ll Need
Creating the perfect buckeye bars requires simple pantry staples, but the star is the peanut butter. Use a creamy, no-stir peanut butter for best texture. Here’s exactly what you’ll need:
Peanut Butter Layer
- 1 cup unsalted butter, softened
- 1 ½ cups creamy peanut butter (no-stir)
- 3 cups powdered sugar
- 1 teaspoon vanilla extract
- Pinch of salt
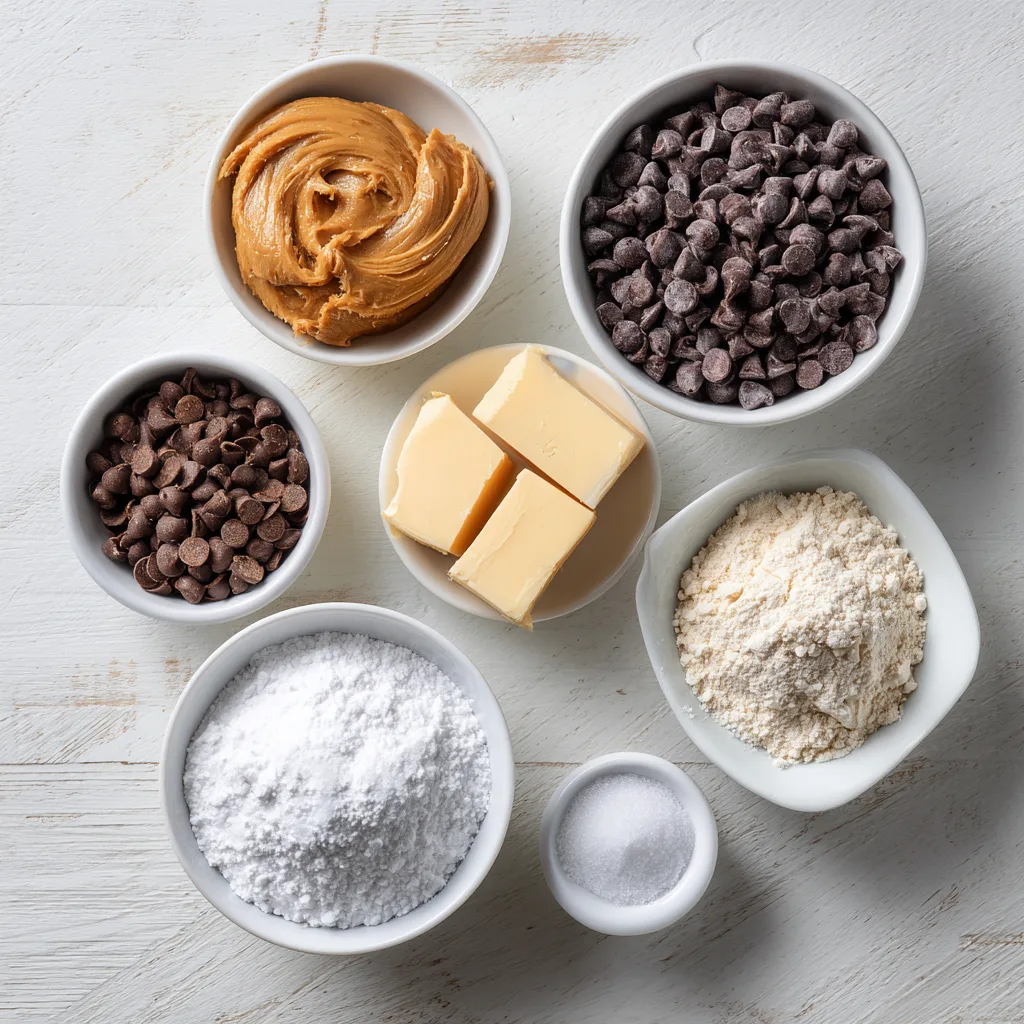
Chocolate Topping
- 2 cups semi-sweet chocolate chips
- 3 tablespoons butter (for smooth melting)
⭐ How to Make Buckeye Bars (Step-by-Step)
1. Prepare the Pan
Line a 9×13-inch baking pan with parchment paper, leaving extra overhang on the sides so you can lift the bars out easily.
2. Make the Peanut Butter Layer
In a large mixing bowl, beat the softened butter and peanut butter until completely smooth and creamy. Add the powdered sugar gradually, mixing until a soft, thick dough forms. Mix in the vanilla and salt.
Press the mixture evenly into the prepared pan. Use the back of a spoon or your hands to smooth the top.
3. Make the Chocolate Topping
Melt the chocolate chips and butter together in a microwave-safe bowl or over a double boiler. Stir until glossy and smooth.
Pour the chocolate over the peanut butter layer and spread evenly with a spatula.
4. Chill
Refrigerate for at least 2 hours, or until the chocolate is fully set.
5. Slice and Serve
Lift the bars out using the parchment. Warm a knife under hot water, wipe dry, and slice into clean squares.
Buckeye Bars
Ingredients
Equipment
Method
- Line a 9×13-inch baking pan with parchment paper, leaving overhang for easy removal.
- Beat butter and peanut butter together until smooth and creamy.
- Gradually add powdered sugar until a thick, smooth dough forms. Mix in vanilla and salt.
- Press the peanut butter mixture evenly into the prepared pan.
- Melt chocolate chips and butter together until smooth and glossy.
- Spread the chocolate evenly over the peanut butter layer.
- Refrigerate for at least 2 hours or until fully set.
- Lift from the pan, slice into bars, and serve.
Notes
⭐ Tips for Perfect Buckeye Bars
- Use no-stir peanut butter — natural peanut butter is too oily.
- Softened butter works best for the peanut butter layer texture.
- Add a pinch of salt — it balances sweetness and boosts flavor.
- Warm the knife before slicing to avoid chocolate cracks.
- Chill long enough for clean edges and defined layers.
⭐ Variations
- Crunchy version: Add chopped peanuts to the peanut butter layer.
- Extra thick bars: Use an 8×8 pan instead of 9×13.
- Dark chocolate lovers: Replace semi-sweet chocolate with dark chocolate chips.
- Holiday version: Add sprinkles on the chocolate before it sets.
- Salted version: Sprinkle flaky sea salt on top for a gourmet finish.
⭐ How to Store Buckeye Bars
- In the fridge: Up to 1 week.
- In the freezer: Up to 3 months — freeze solid first, then wrap individually.
- Room temperature: Safe for several hours at parties.
These bars taste best cold, but they’re still amazing at room temp — soft, rich, and perfectly balanced.
Ingredients (List Format)
- 1 cup unsalted butter, softened
- 1 ½ cups creamy peanut butter
- 3 cups powdered sugar
- 1 teaspoon vanilla extract
- Pinch of salt
- 2 cups semi-sweet chocolate chips
- 3 tablespoons butter
Instructions (Numbered)
- Line a 9×13 pan with parchment paper.
- Beat softened butter and peanut butter until smooth.
- Add powdered sugar gradually until thick and creamy.
- Mix in vanilla and salt.
- Press the peanut butter mixture evenly into the pan.
- Melt chocolate chips and butter until smooth.
- Spread chocolate evenly over the peanut butter layer.
- Chill for 2 hours or until set.
- Slice and enjoy.